Adobe Creative Cloud - Home Use Instructions - Windows & Mac
Windows
| 1. Open your web browser and go to https://www.adobe.com/in/creativecloud/desktop-app.html Click the blue Download button in the top menu bar. | 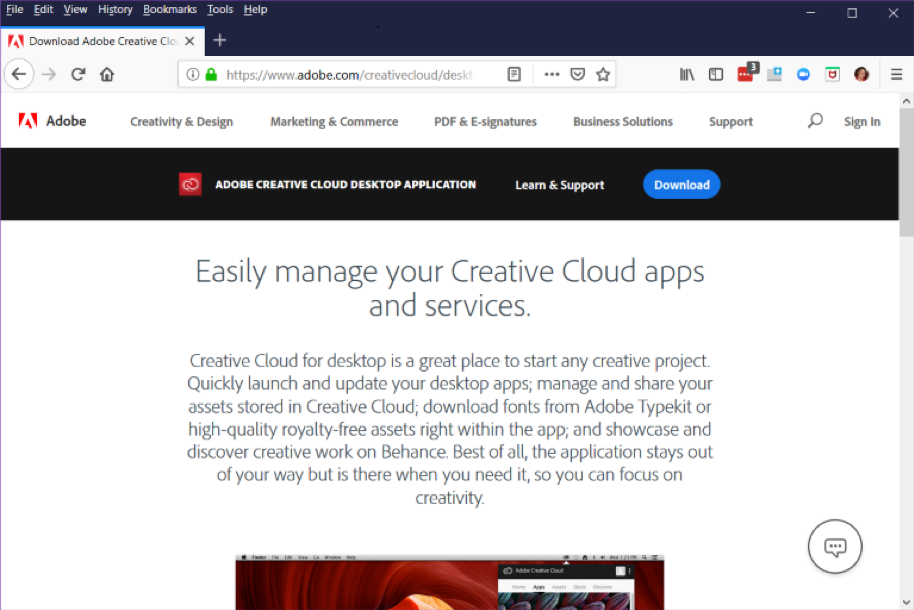 |
| 2. Scroll down until you see Creative Cloud on the left of the screen and click on that Download button. |  |
3. Locate the Creative_Cloud_Set-Up.exe file that was just downloaded. It will usually be found in your Downloads folder. Double-click on the filename to start the installation and setup process. Note: The installation process may take a few minutes. | 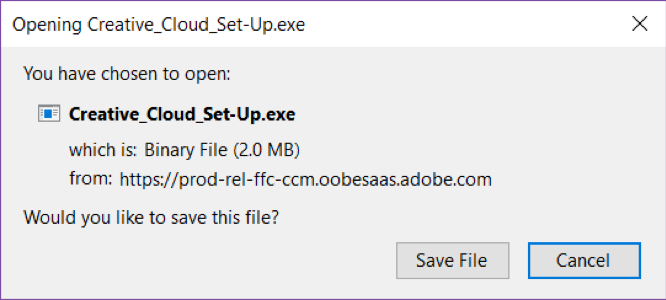 |
4. If you are asked Do you want to allow this app to make changes to your device?, click Yes | 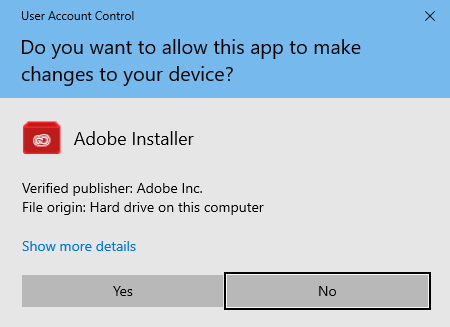 |
5. On the next screen, click Sign In | 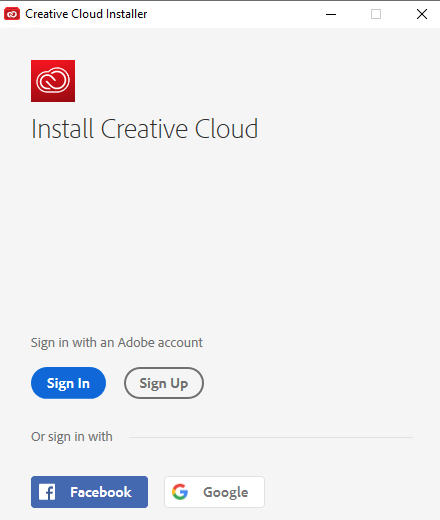 |
| 6. Enter your Humboldt email address (e.g. abc123@humboldt.edu) and click on the blue "Sign In" button. | 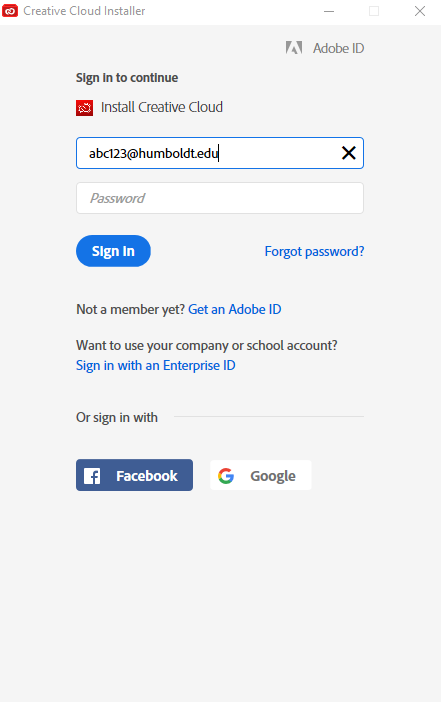 |
| 7. In the Enterprise ID Sign in window, enter your regular Humboldt credentials. If you are enrolled in our DUO multi-factor authentication system, you will need to approve the login through DUO after entering your credentials.) |
|
8. Click on the blue Start Installing button. The installation will take a few minutes. | 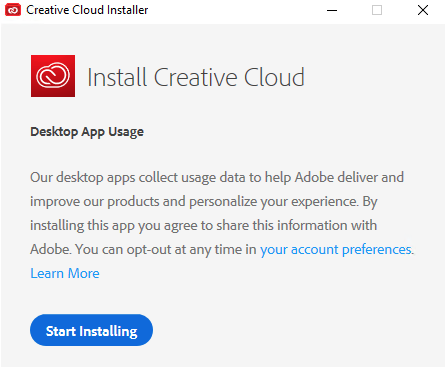 |
9. Adobe Creative Cloud should start automatically and may also update itself immediately on launch. A shortcut to the application will also appear on your Desktop. You can now install any of the Adobe Creative Cloud applications by simply clicking on the Install button to the right of the program name. | 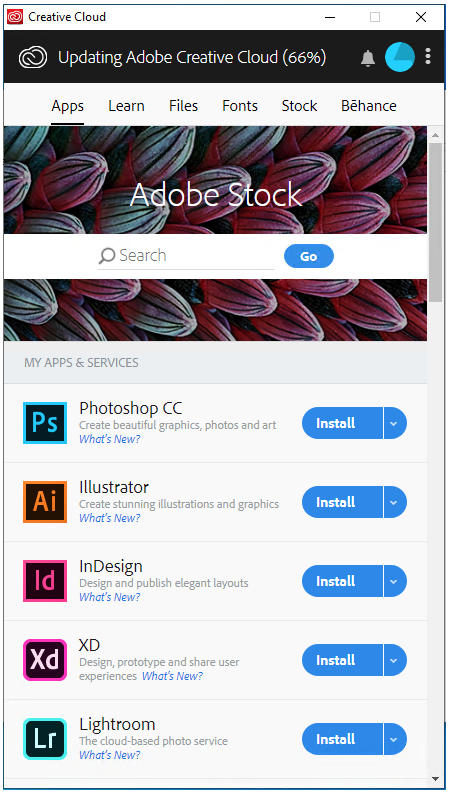 |
Our Adobe licensing agreement limits users to 2 concurrent Creative Cloud logins. |
Mac
| 1. Open your web browser and go to https://www.adobe.com/in/creativecloud/desktop-app.html. Click the blue Download button in the top menu bar. | |
| 2. Locate Creative Cloud on the left of the screen (you may need to scroll down slightly) and click on that blue Download button | |
3. Double-click the Creative_Cloud_Installer.dmg file that was downloaded - it will be in your Downloads folder. The disk image will mount on your desktop. Open the disk image and double-click on the Creative Cloud Installer. | 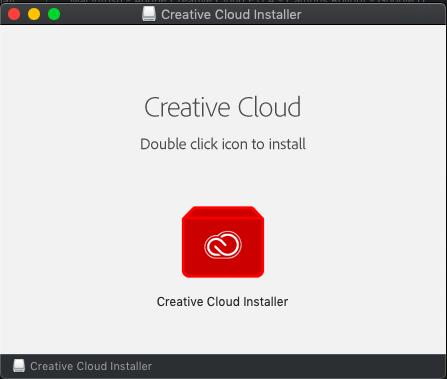 |
4. If you see the warning ...Are you sure you want to open it?, click on Open. |  |
5. You will see a dialog box stating that Creative Cloud Installer wants to make changes to your system. Enter your administrator username and password to enable the installation to proceed. | 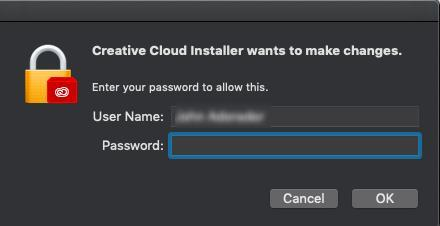 |
6. Click on the blue Sign In button | 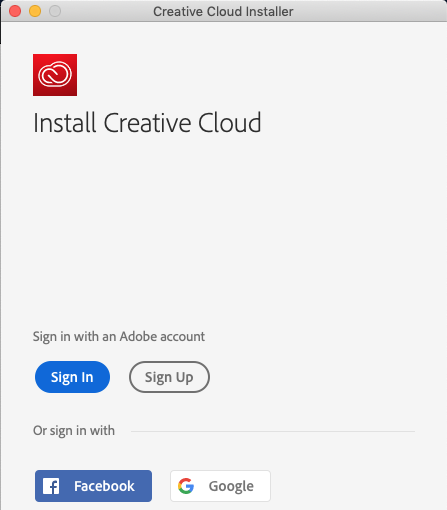 |
7. Enter your Humboldt email address (e.g. abc123@humboldt.edu) and click on the blue "Sign In" button. |  |
| 8. In the Enterprise ID Sign in window, enter your regular Humboldt credentials, If you are enrolled in our DUO multi-factor authentication system, you will need to approve the login through DUO after entering your credentials. | 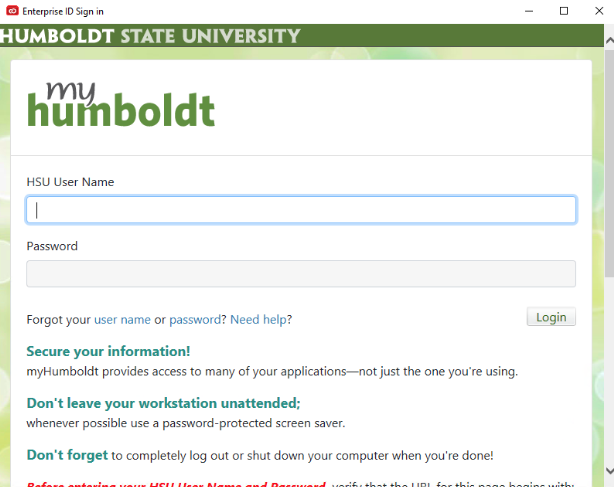 |
9. Click the blue Start Installing button in the Install Creative Cloud window. Be aware that the installation may take up to 20 minutes or so. | 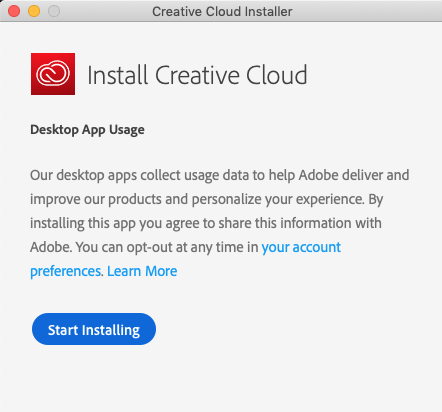 |
10. The Adobe Creative Cloud application should then install and start automatically. You can now install any of the Adobe Creative Cloud applications by simply clicking the Install button to the right of the program. | 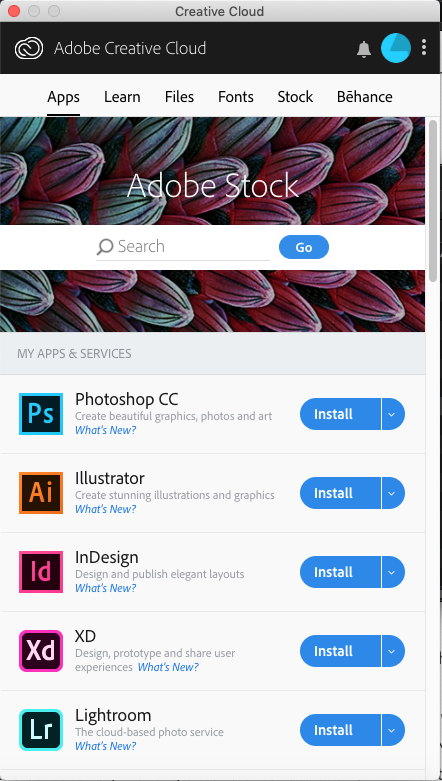 |
11. To access Adobe Creative Cloud in future, click the icon in the Menu Bar (highlighted here). Alternatively, you will find the program in your Applications folder. |  |
Our Adobe licensing agreement limits users to 2 concurrent Creative Cloud logins. |
Help Desk Hours
Summer 2026Monday - Friday: 8am - 4:30pm
Closed May 25, June 19, July 3
After hours emergencies:
Call UPD at (707) 826-5555
System Status
| Status | System | Est. resolution |
|---|---|---|
| Available | All Systems |
|