Using SFTP to Access your vLinux Home Directory Files
Students can access their vLinux home directory files graphically via SSH using the following software:
- WinSCP (Windows-only)
- FileZilla (Windows, macOS, and Linux)
- Cyberduck (macOS-only)
- Visual Studio Code with the Remote - SSH extension installed (Windows, macOS, and Linux)
WinSCP
WinSCP is installed on all Humboldt lab computers.
For personally-owned computers, you can download WinSCP at https://winscp.net/eng/download.php
Once it's installed, search for WinSCP in the Start Menu, and click on it.
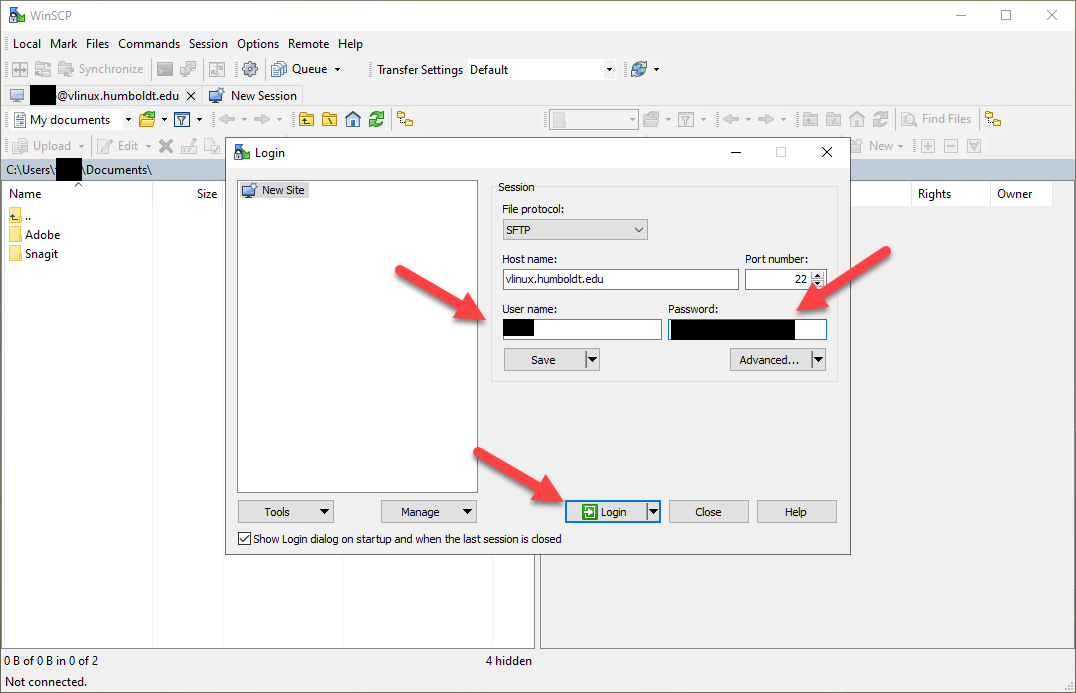
WinSCP will launch and prompt you to enter a hostname and user name and password.
Enter hostname vlinux.humboldt.edu, leave the default port number 22, enter your Humboldt user name and password, and click login:
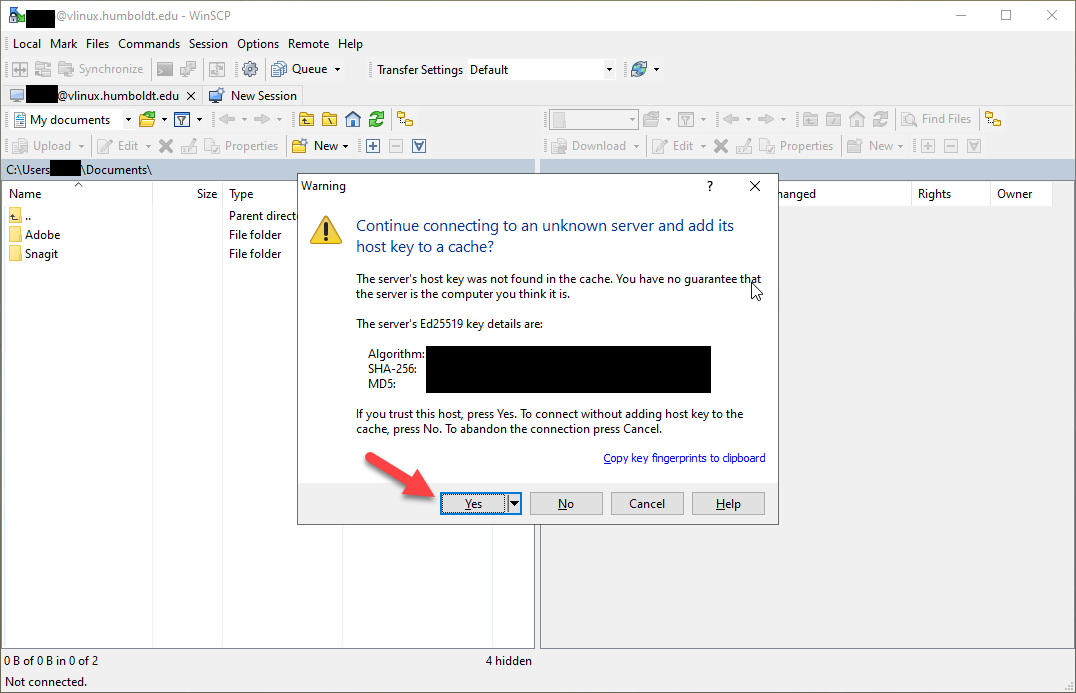
When logging in for the first time, you will receive a warning prompt to accept the server's host key. Click yes:
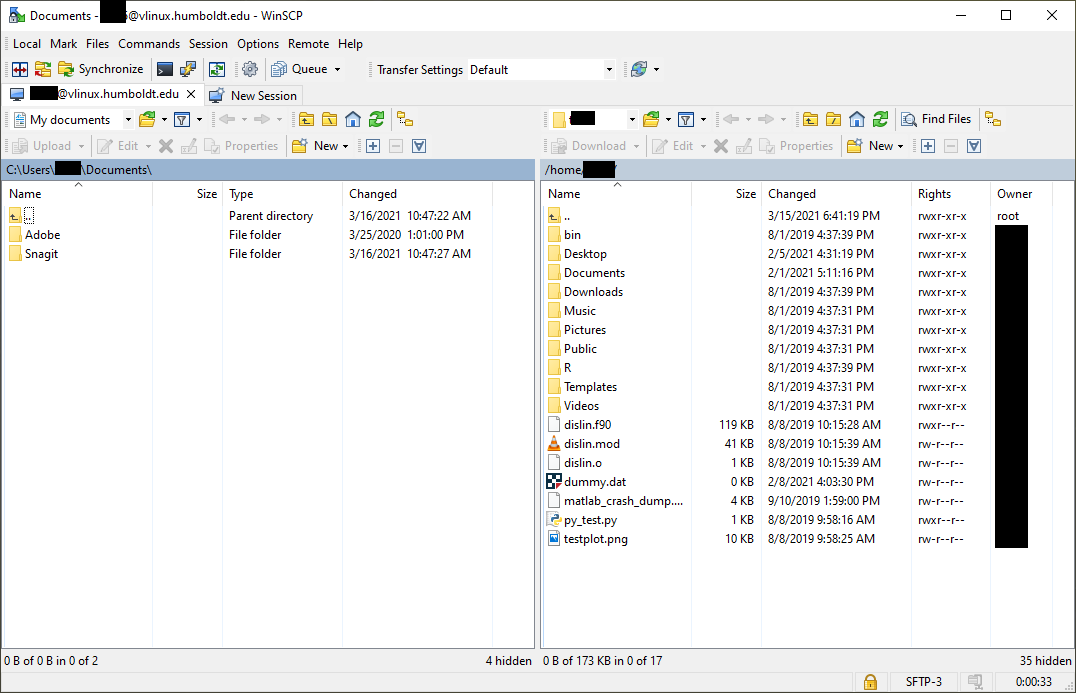
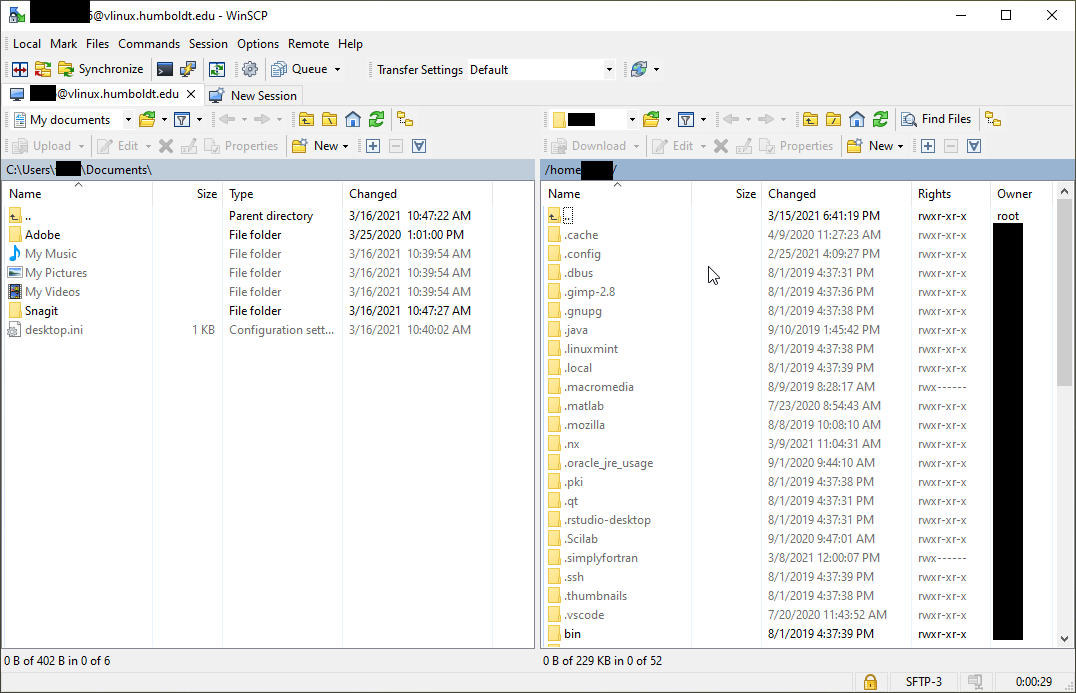
After clicking yes, you will be presented with a graphical listing of your vLinux home directory on the remote pane of the WinSCP window on the right:
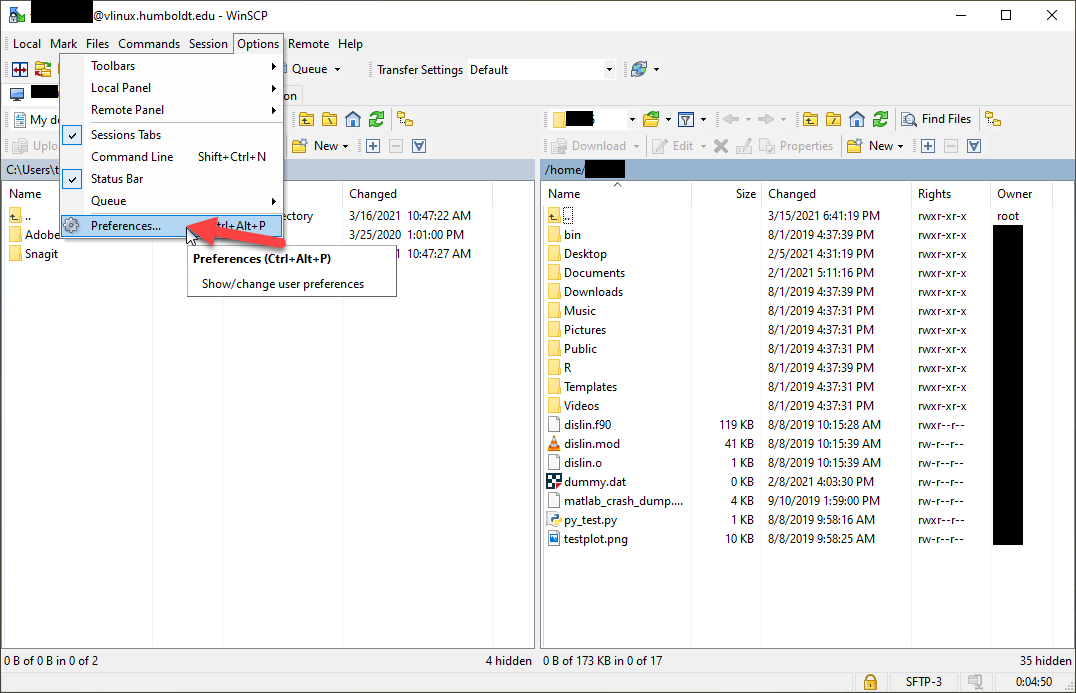
At times, you may need to access your hidden dotfiles located in your vLinux home directory. To do so, click on options, preferences:
Within the preferences window that appears, click on Panels on left pane of the preferences window:
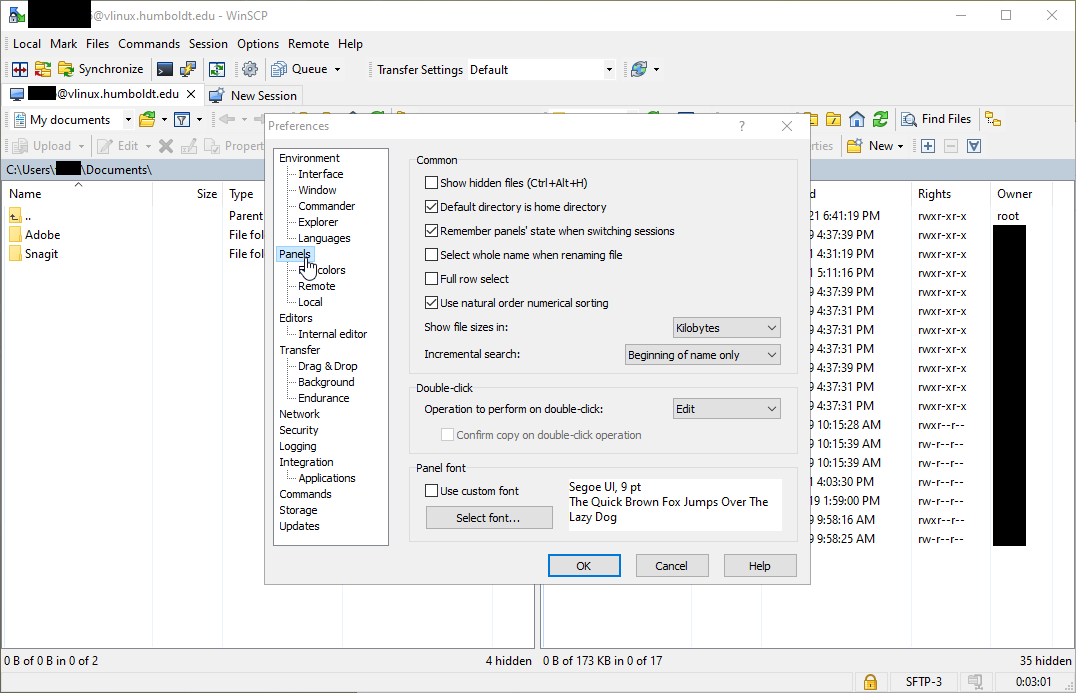
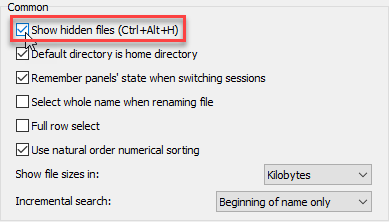
Click on the Show hidden files checkbox to show hidden files located in your vLinux home directory and then click OK:
The remote view pane of your WinSCP session should now look something like this:
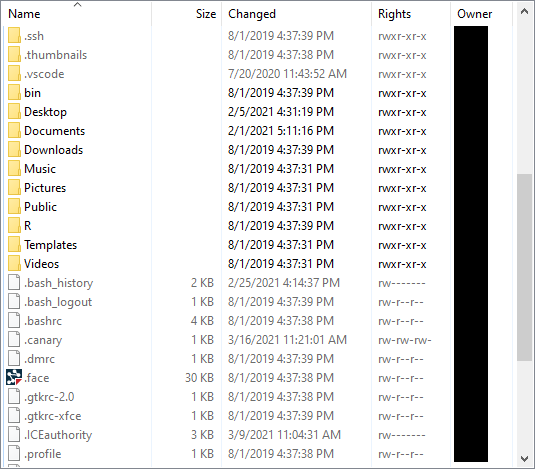
Scroll through the remote pane of the WinSCP remote pane to see the rest of your files:
Navigate through your vLinux home directory's folders to find any files that may need to be deleted to resolve any quota issues.
Right-click on any files that need to be deleted and click on delete to delete them from your home directory.
You can also back up your files to your local computer by clicking on them and dragging them to the local pane of the WinSCP window.
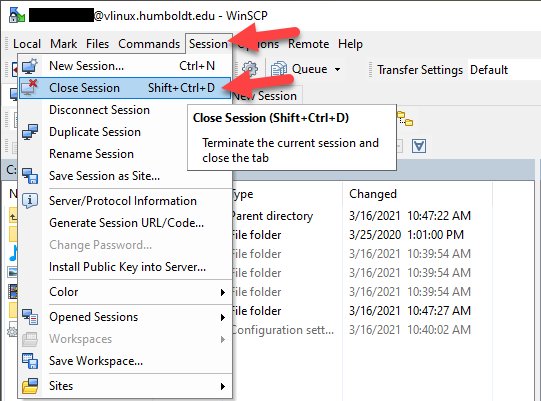
When finished with using WinSCP for backing up or deleting any files in your vLinux home directory, click on Session, and Close Session to end your remote WinSCP session:
If you had any quota issues that prevented you from logging on to vLinux, you should now be able to log back on if you freed up enough space in your vLinux home directory.
FileZilla
For those who prefer using FileZilla, here are a series of screenshots showing you how to access your vLinux files using FileZilla's interface.
After downloading and installing FileZilla from https://filezilla-project.org/ you should see the following screen when launching it for the first time:
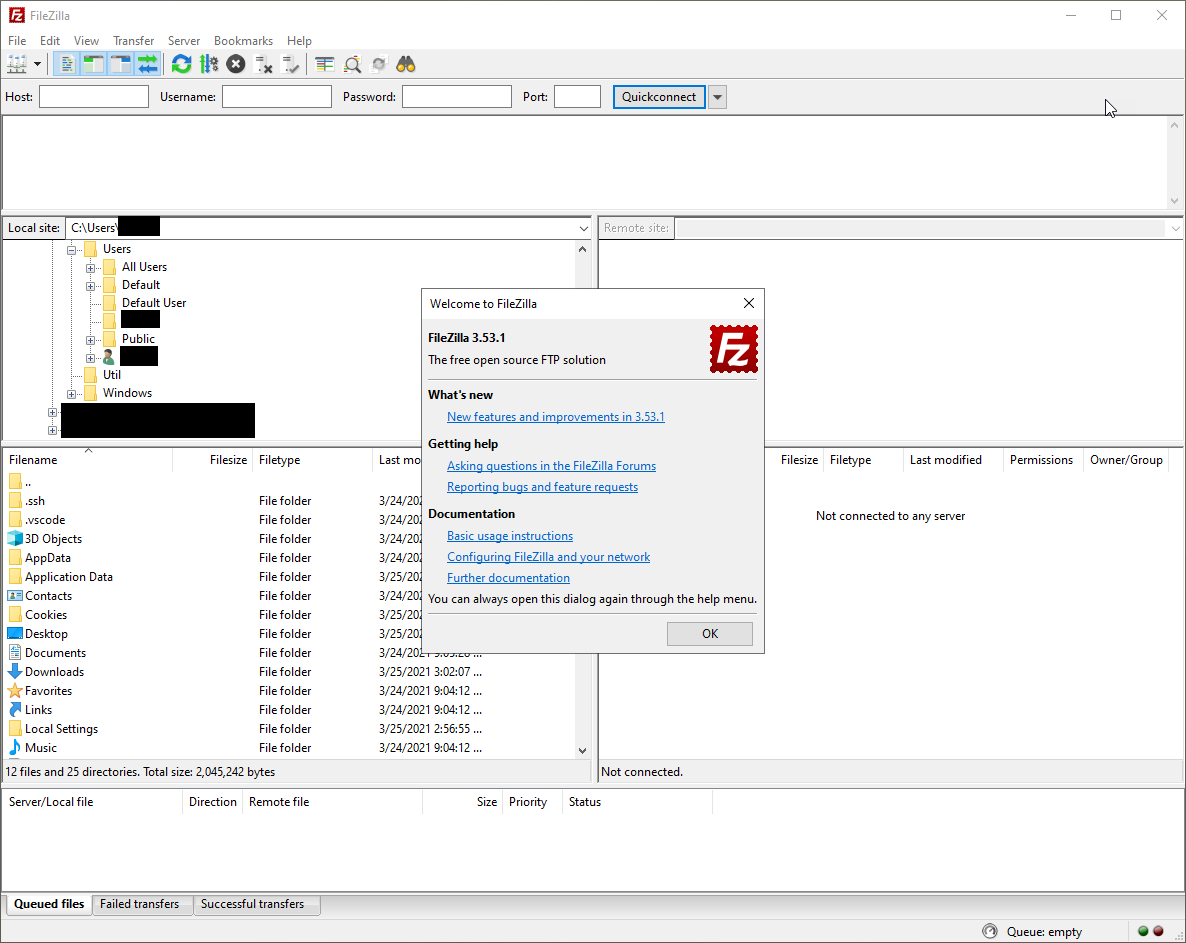
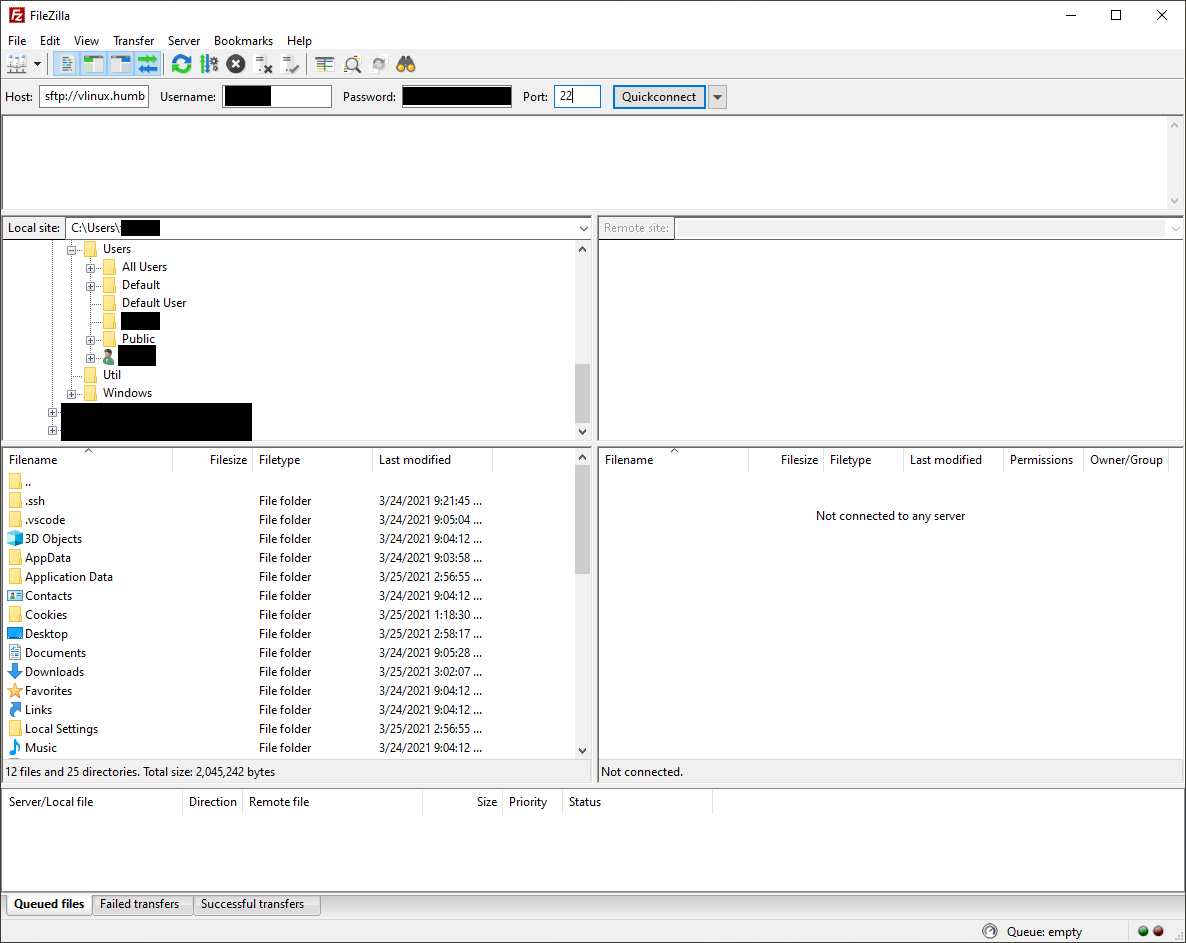
Click OK to close the welcome screen. Enter sftp://vlinux.humboldt.edu in the Host field, your Humboldt username in the Username field, your password in the Password field, 22 in the Port field, and click Quickconnect:
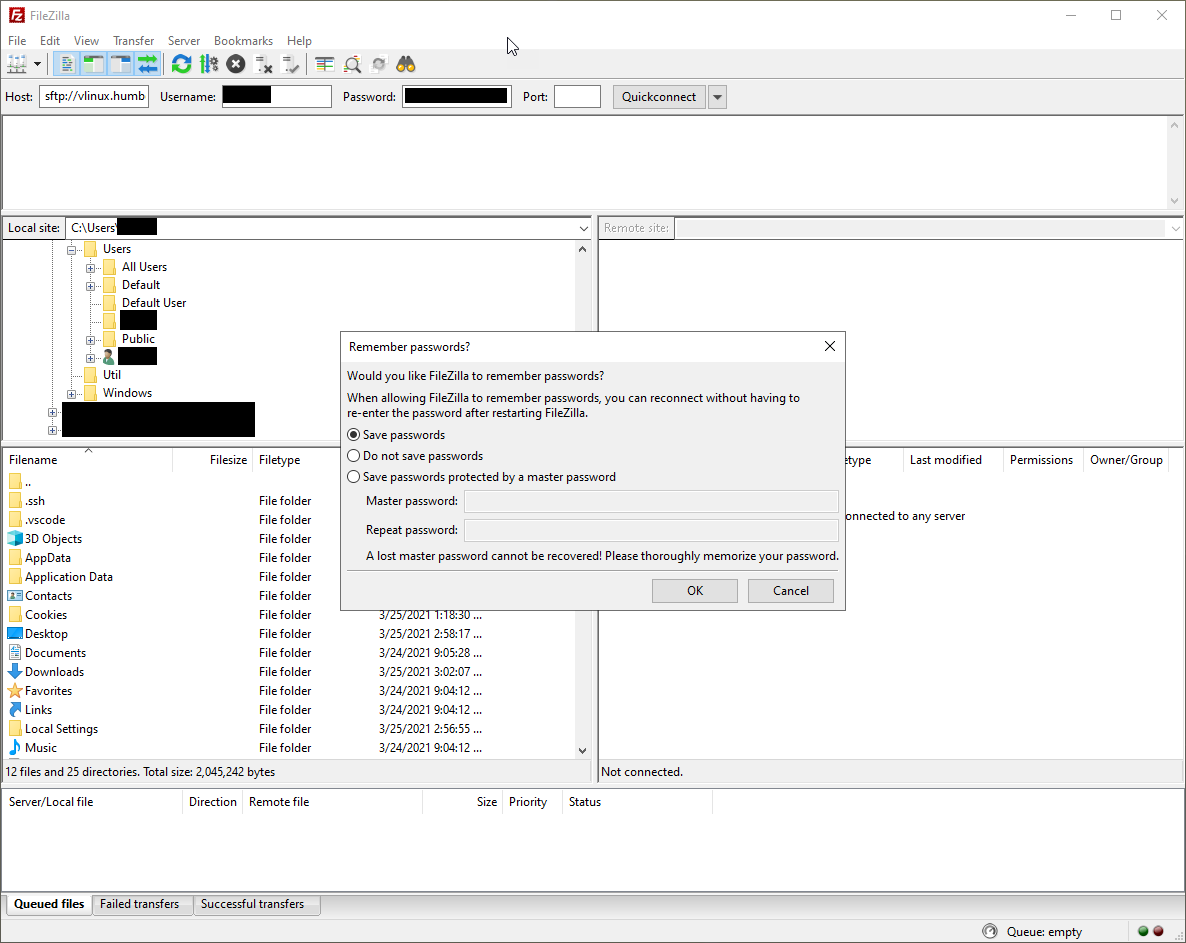
You will be prompted to either save passwords, not save passwords, or create a master password to save all of your login information for a variety of servers (there is no need to do this on lab computers because user profiles are not retained over time):
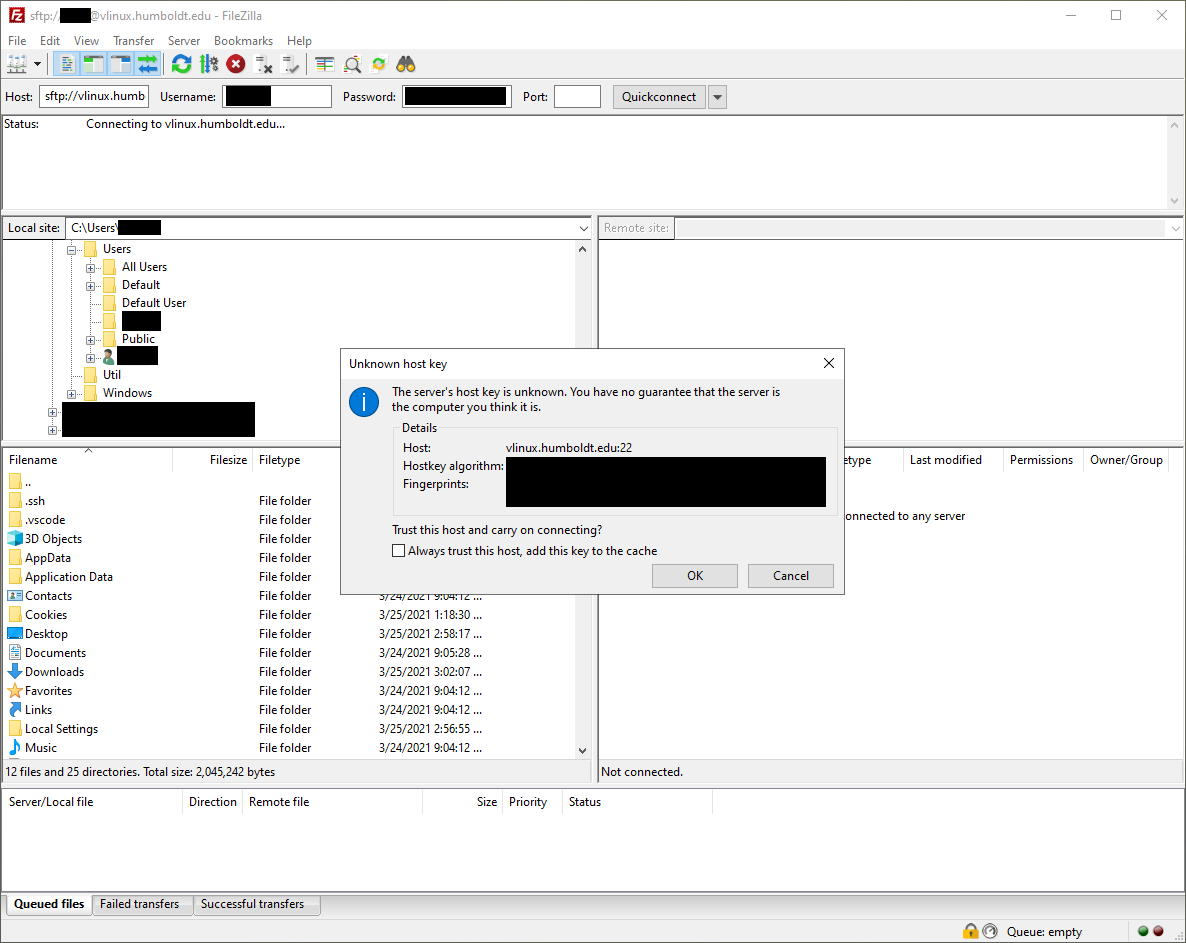
After clicking OK, if this is your first time using FileZilla to connect to vLinux, you will be prompted to accept this server's host key. Click OK:
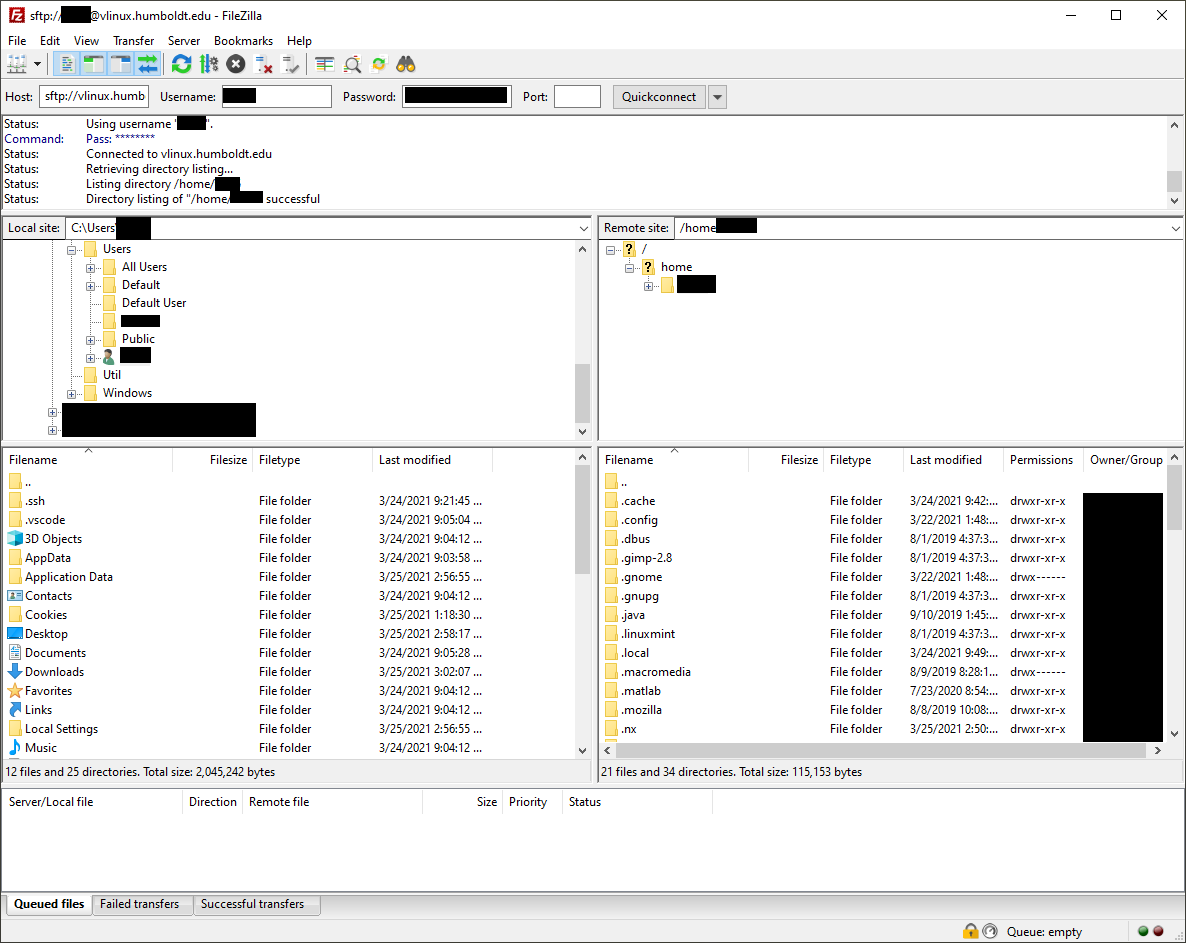
You should now be connected to your vLinux home directory from within FileZilla. Your local files will be displayed on the left window pane and the your vLinux home directory's contents will be listed on the right window pane:
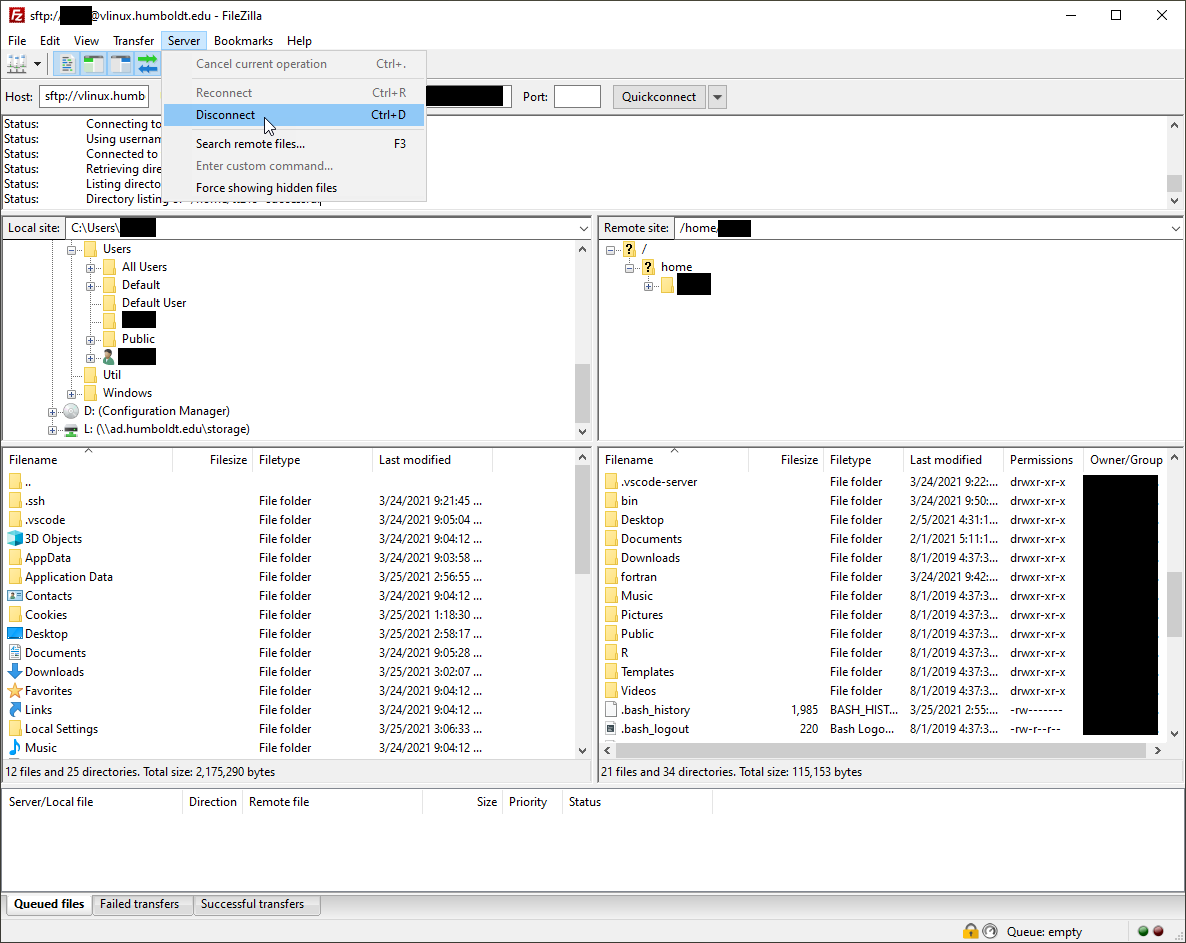
When finished with backing up and/or deleting any excess files from your vLinux home directory, click on Server at the top of the FileZilla window and click on Disconnect:
Cyberduck
Mac users can access their vLinux home directory from their desktop or laptop running macOS by downloading and installing Cyberduck at https://cyberduck.io/
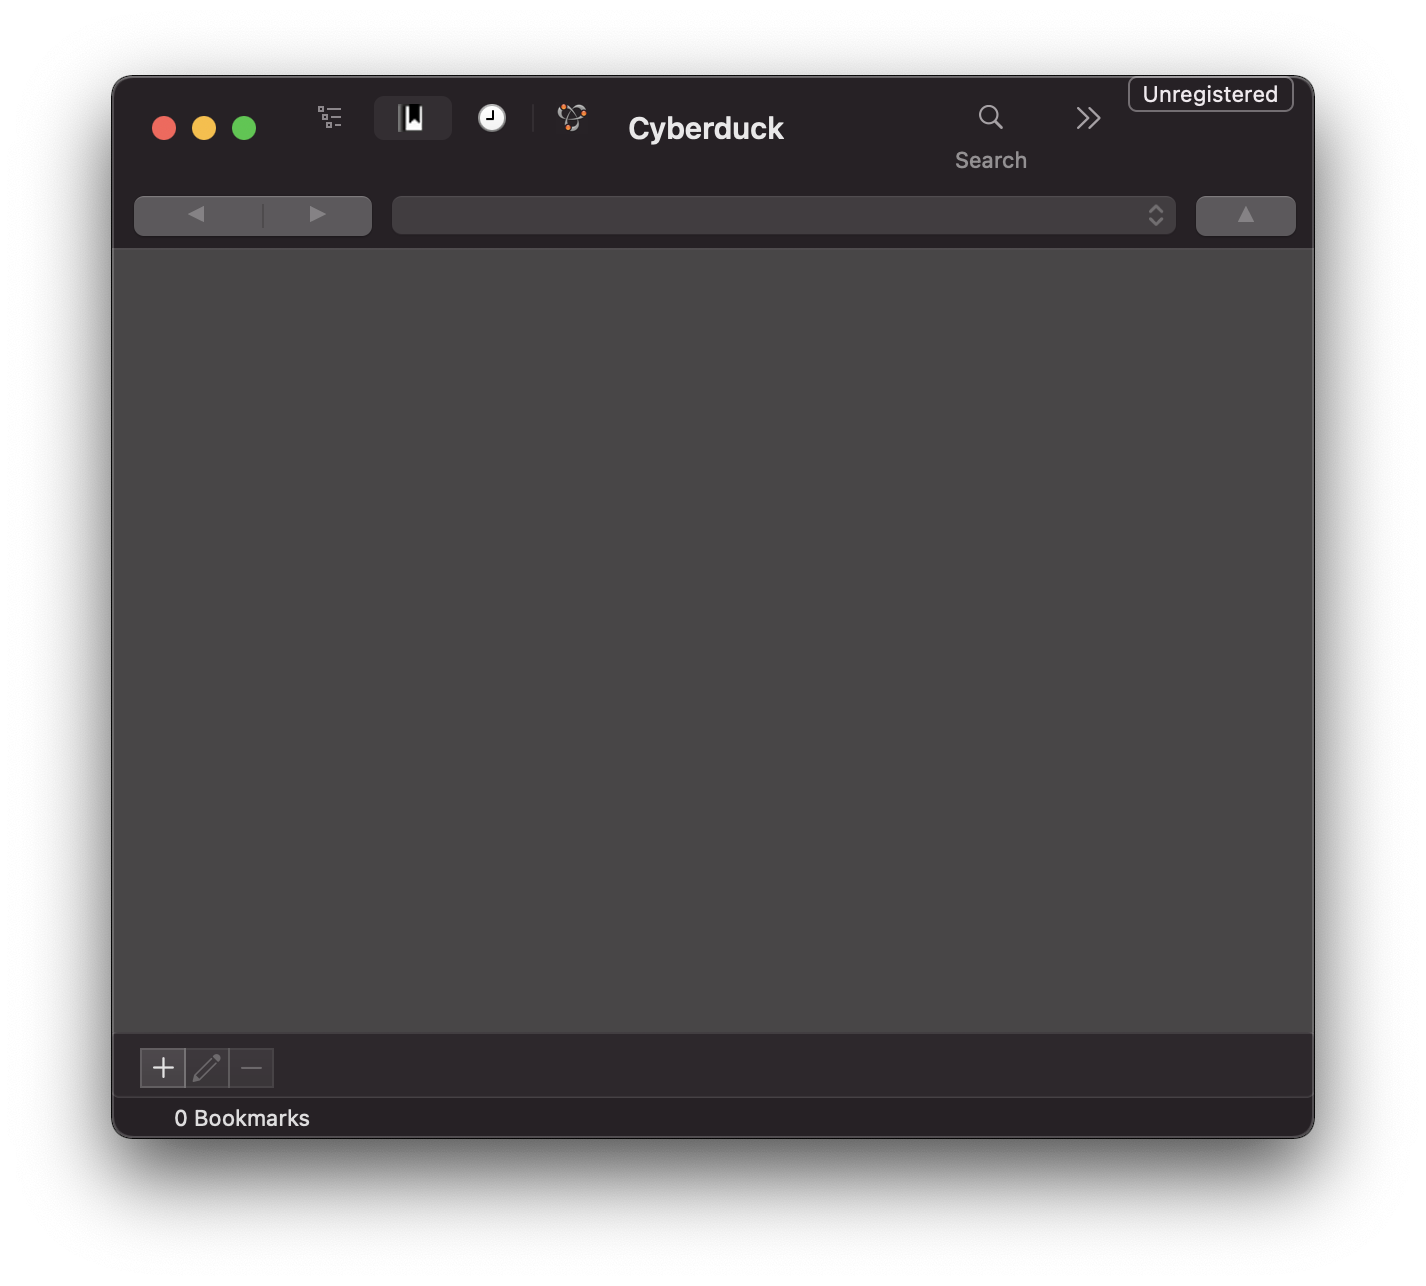
Once it has been installed, you should see a screen like this:
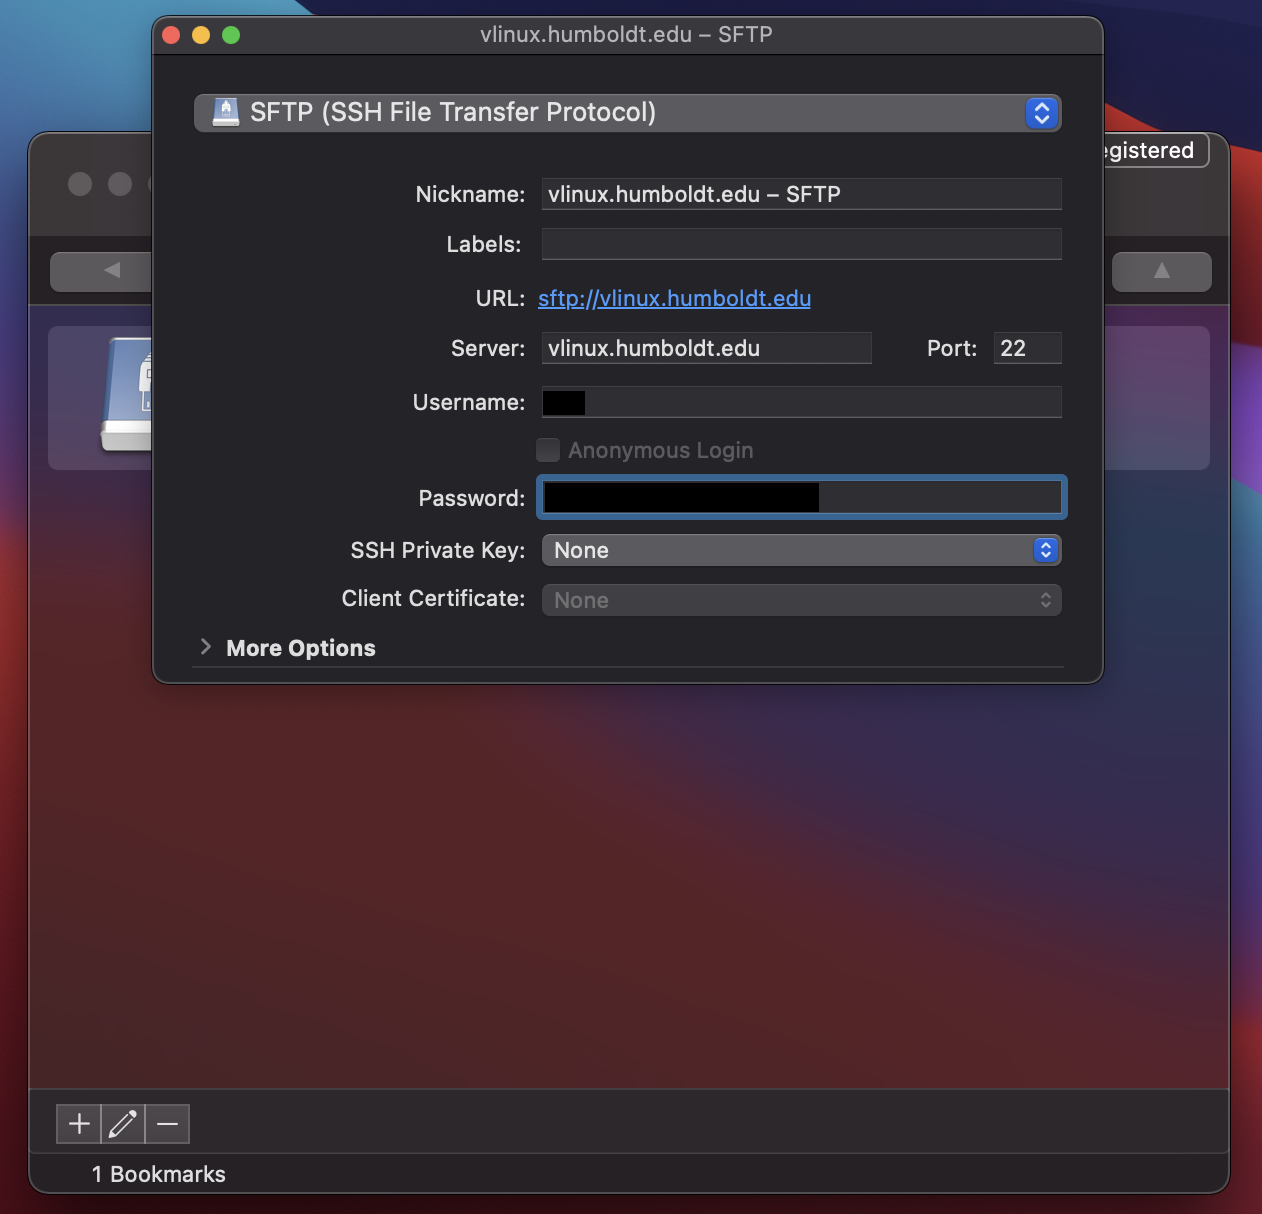
Click on the plus sign at the bottom left-hand side of the Cyberduck window, enter a nickname for vLinux, use the URL sftp://vlinux.humboldt.edu, the server address vlinux.humboldt.edu, leave the default port number, and then enter your Humboldt username and password:
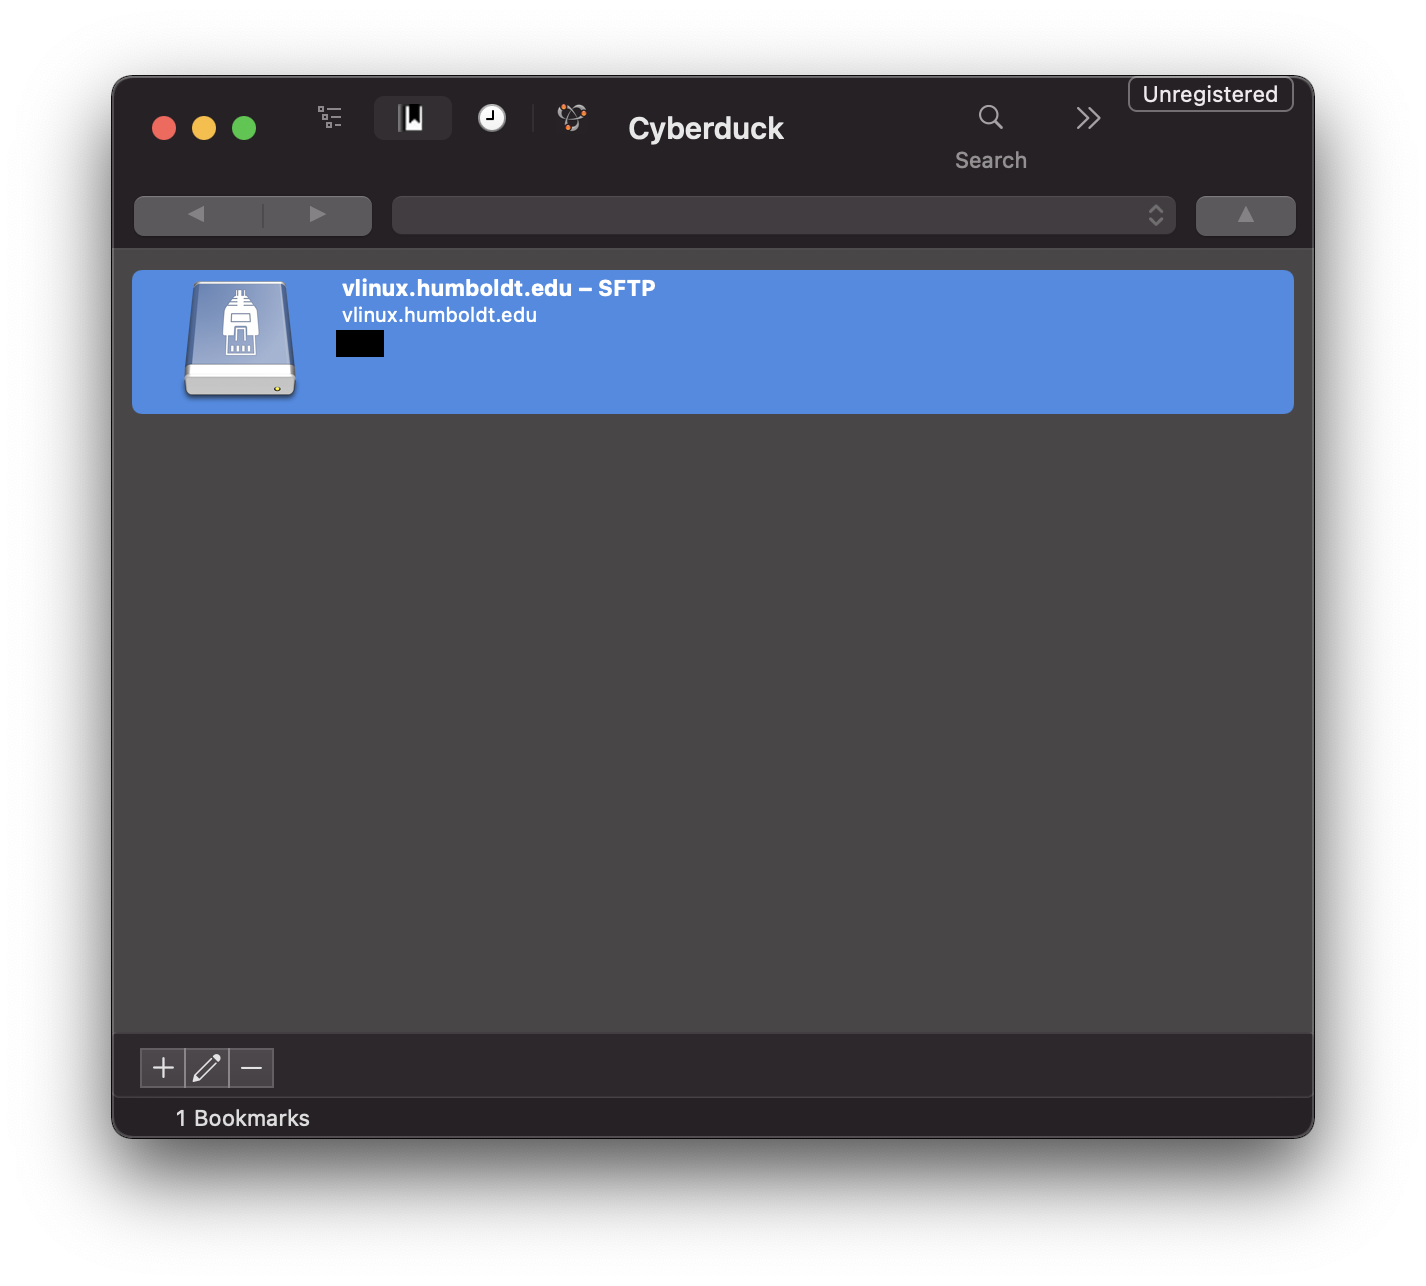
You should now have an entry in the main Cyberduck window that looks like the following:
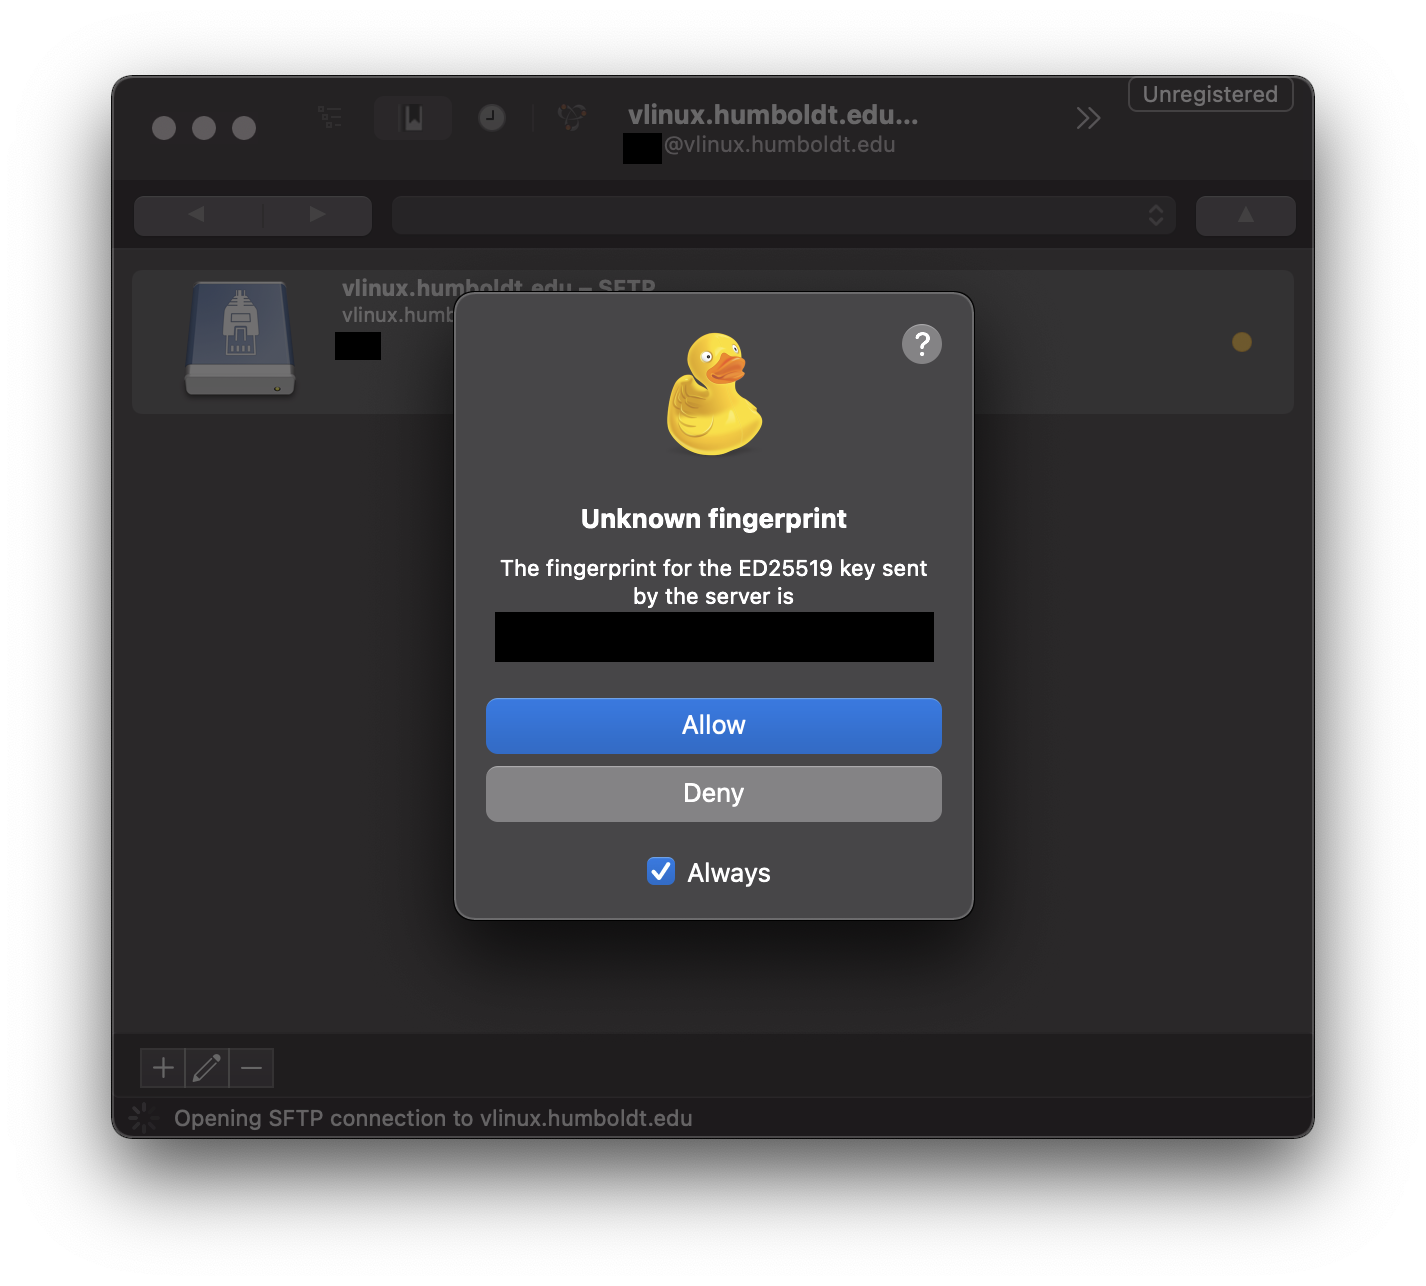
Double-click on it to connect to vLinux. You will be prompted to accept the fingerprint ID when doing this for the first time on a computer. Click Allow:
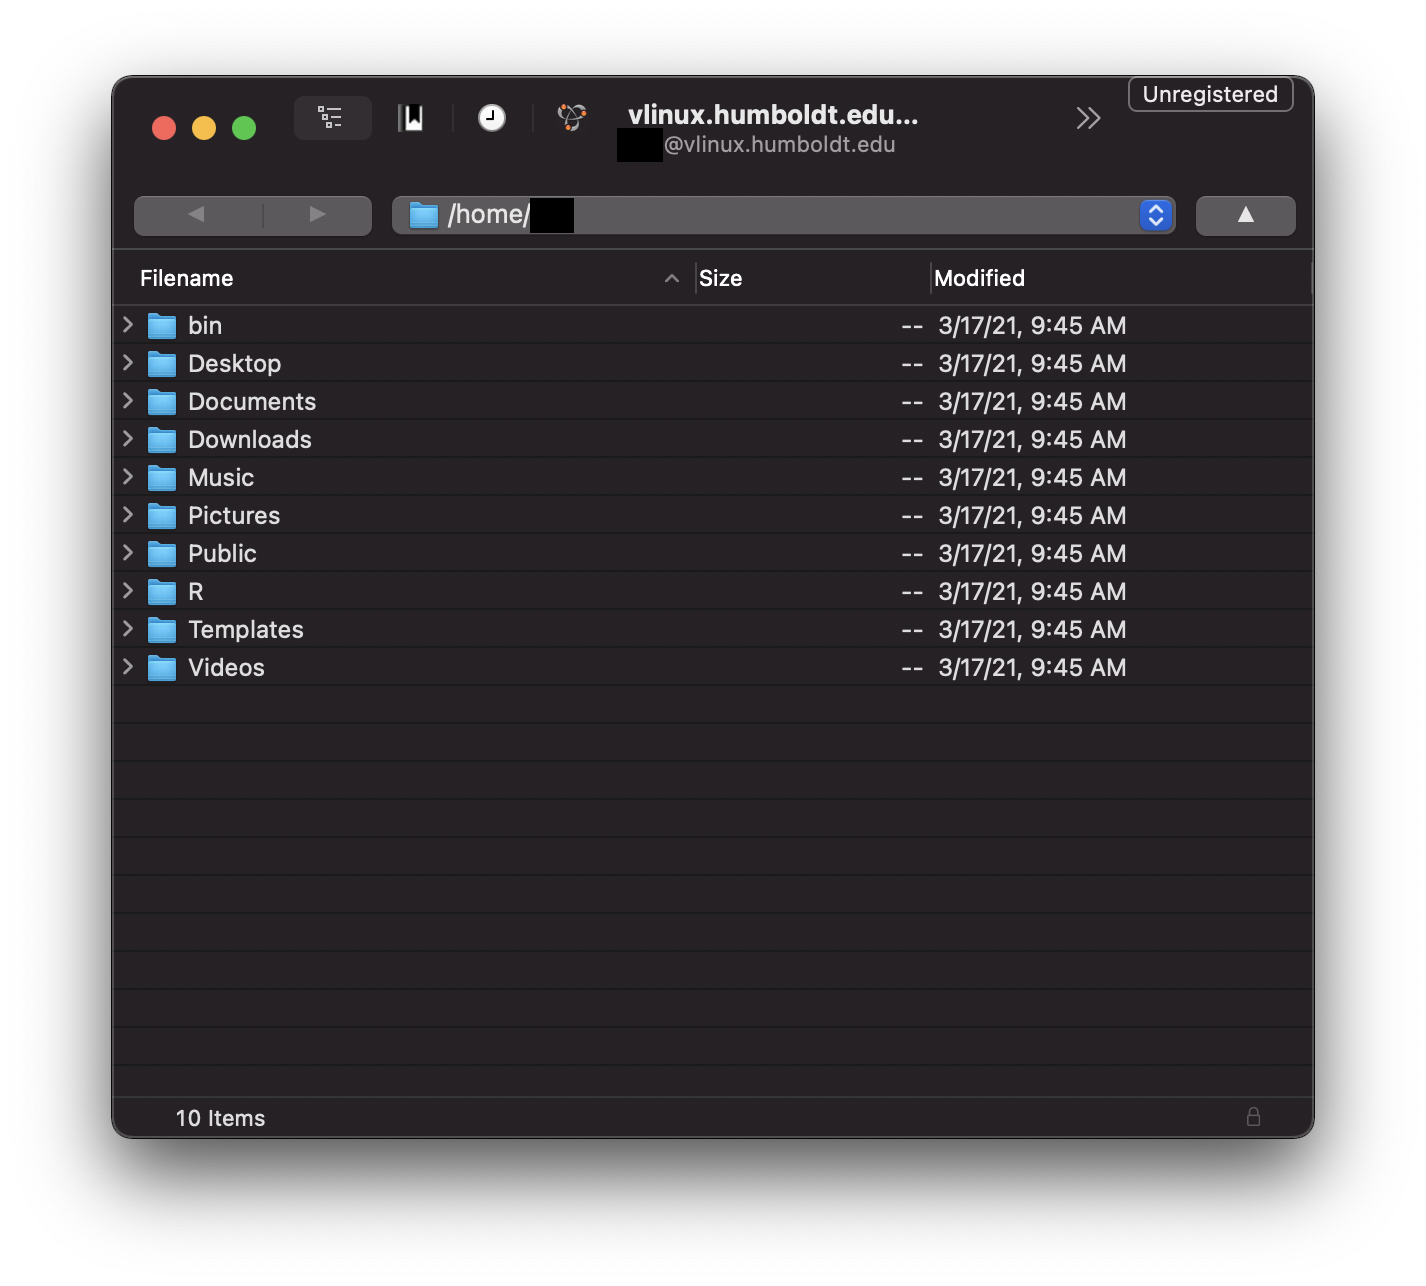
You should now see a listing of the contents of your vLinux home directory:
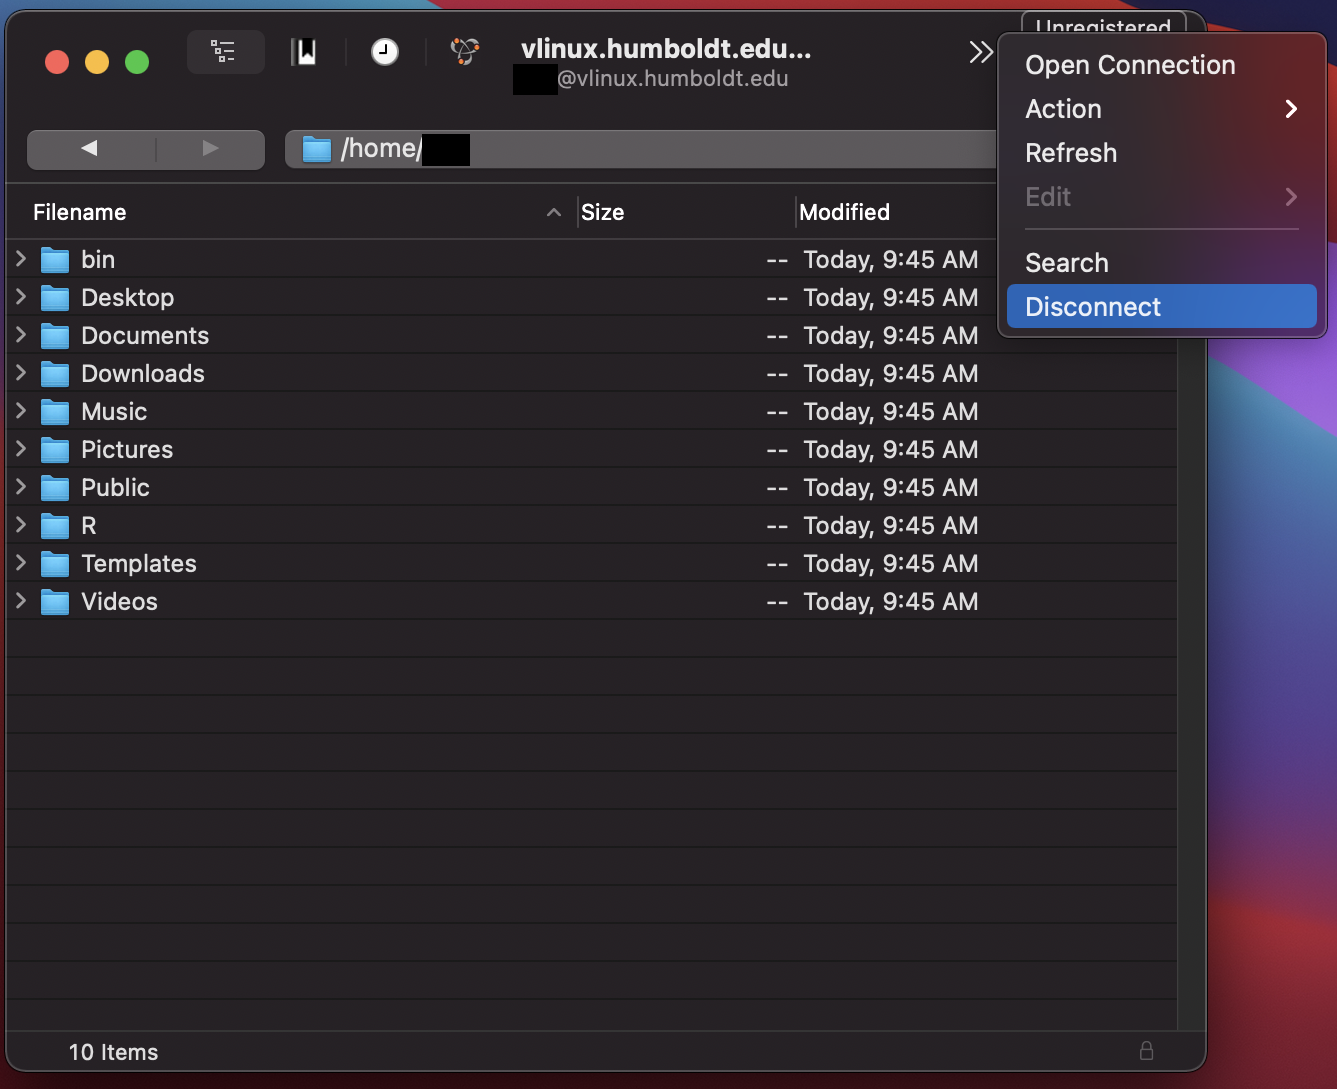
To disconnect from your session, click on the two greater than signs (>>) to the right of where it says vlinux.humboldt.edu, and click Disconnect:
Visual Studio Code
Visual Studio Code with the Remote - SSH extension can also be used to graphically access your and edit your vLinux home directory files.
You can download VS Code for Windows, Mac, or Linux at: https://code.visualstudio.com/
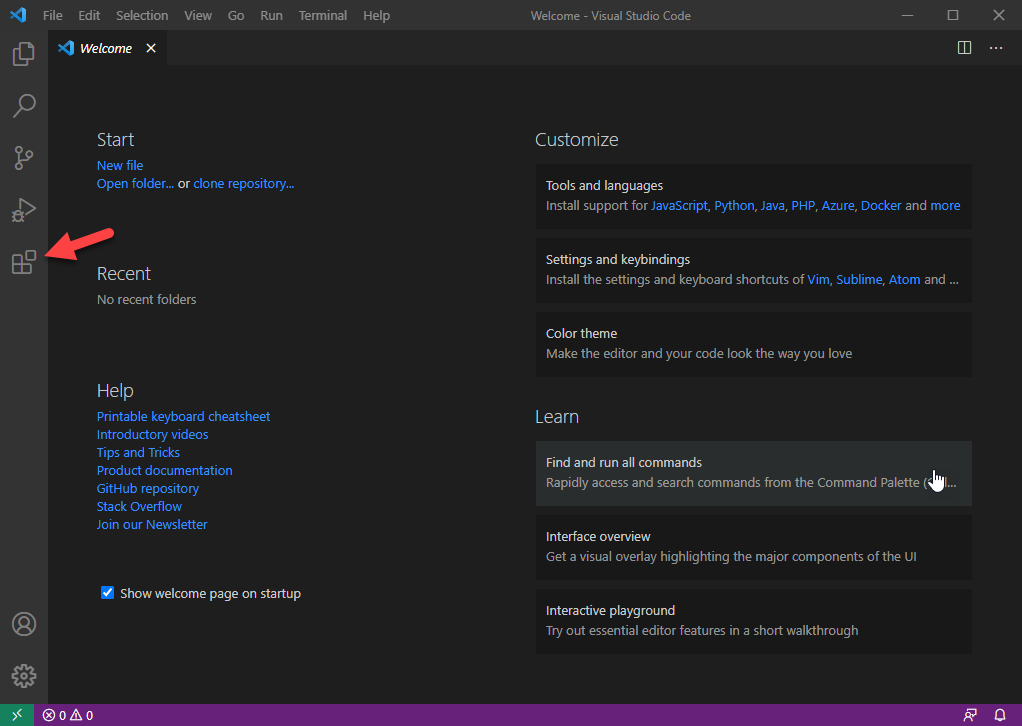
After it's installed, click on the extensions icon on the left-hand side of the window:
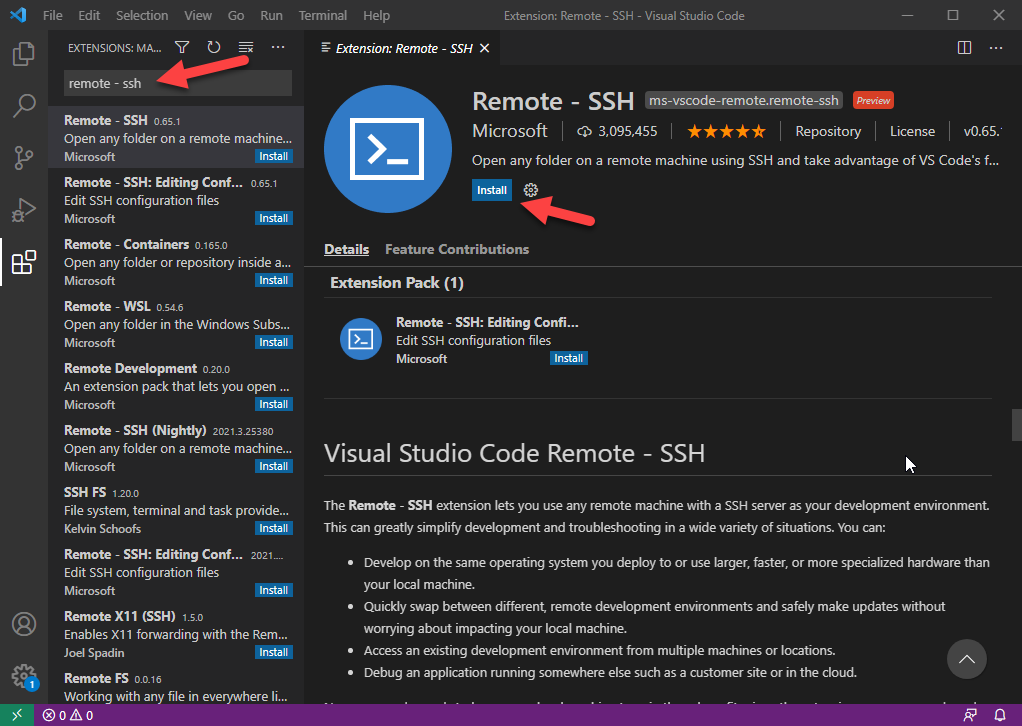
Search for the Remote - SSH extension in the extension search field, click on it, and then click on install:
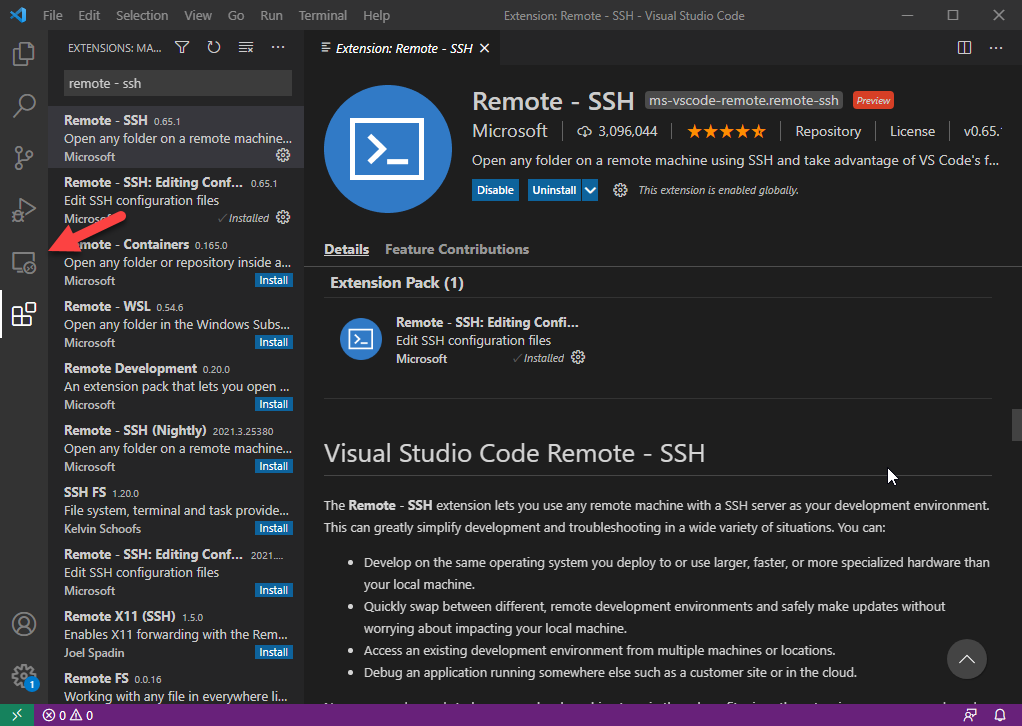
Once the extension has been installed, a new icon will appear above the extensions icon:
Click on the Remote - SSH extension icon, move your mouse pointer over to the right of the SSH Targets section, and click on the plus sign to add the vLinux server hostname:
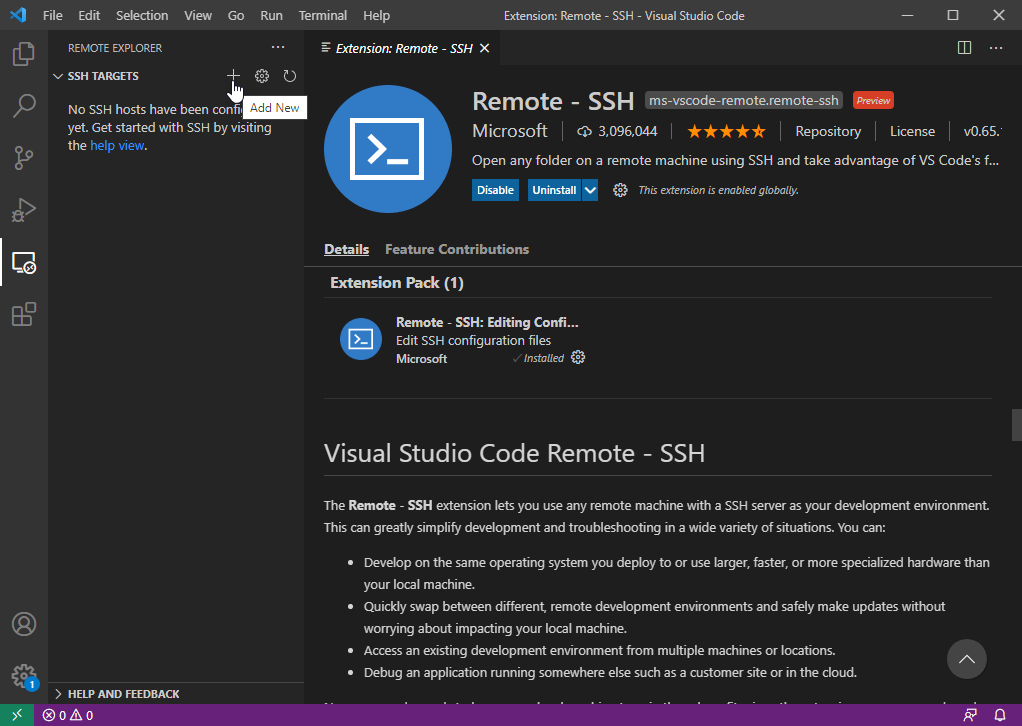
A command pallette field will appear at the top center of VS Code prompting you to enter the hostname:
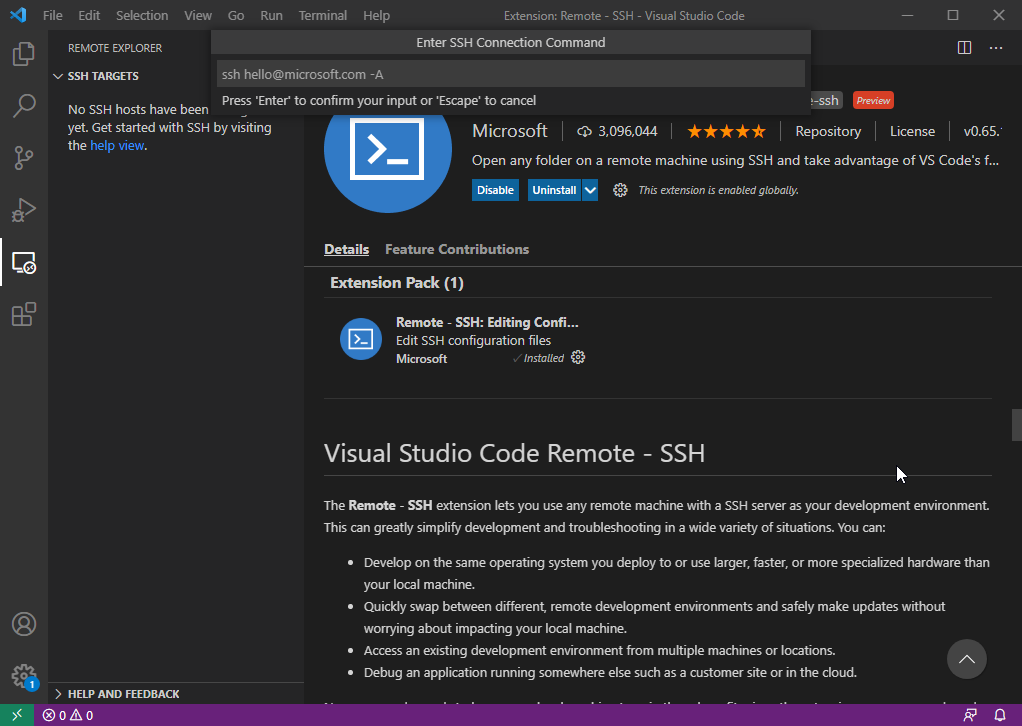
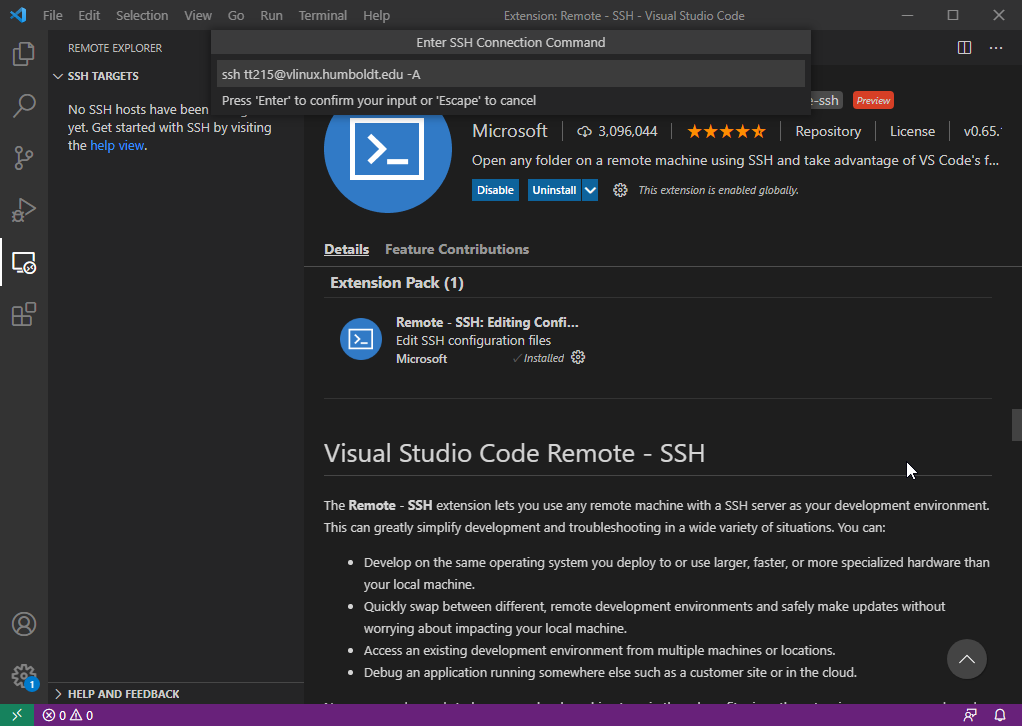
Enter the following: ssh abc123@vlinux.humboldt.edu -A
(where abc123 is your Humboldt username)
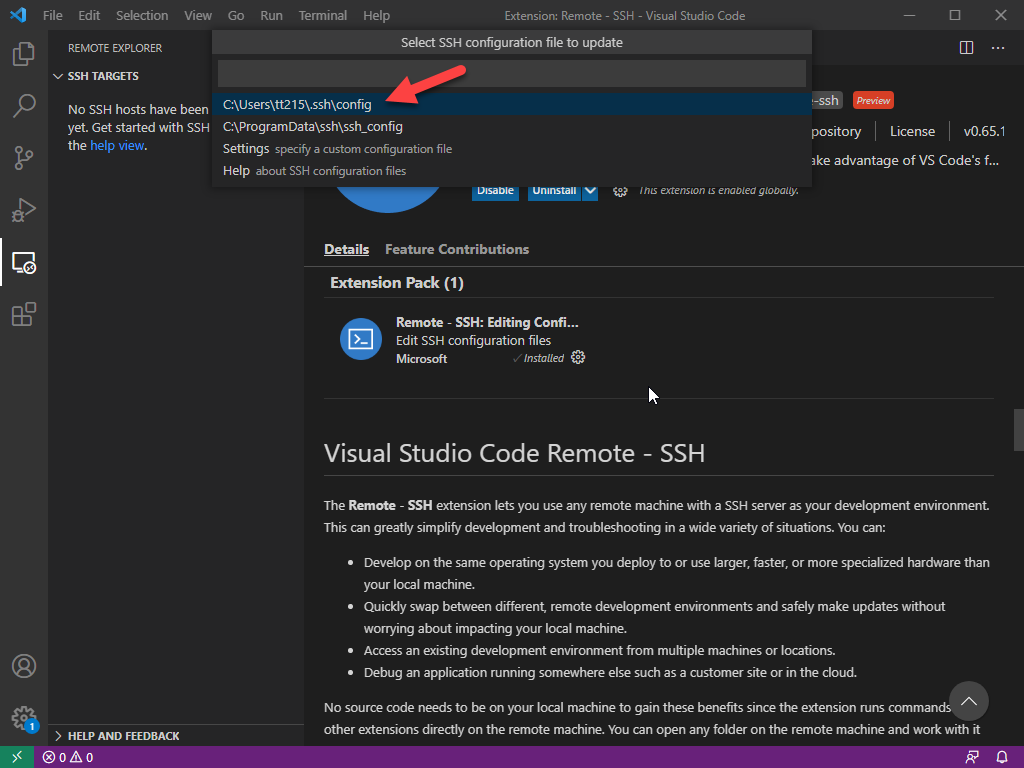
You will be prompted to choose where to have your local SSH configuration file updated. Choose the one from within your user profile:
You should now see a host added pop-up appear at the bottom right-hand side of the VS Code window:
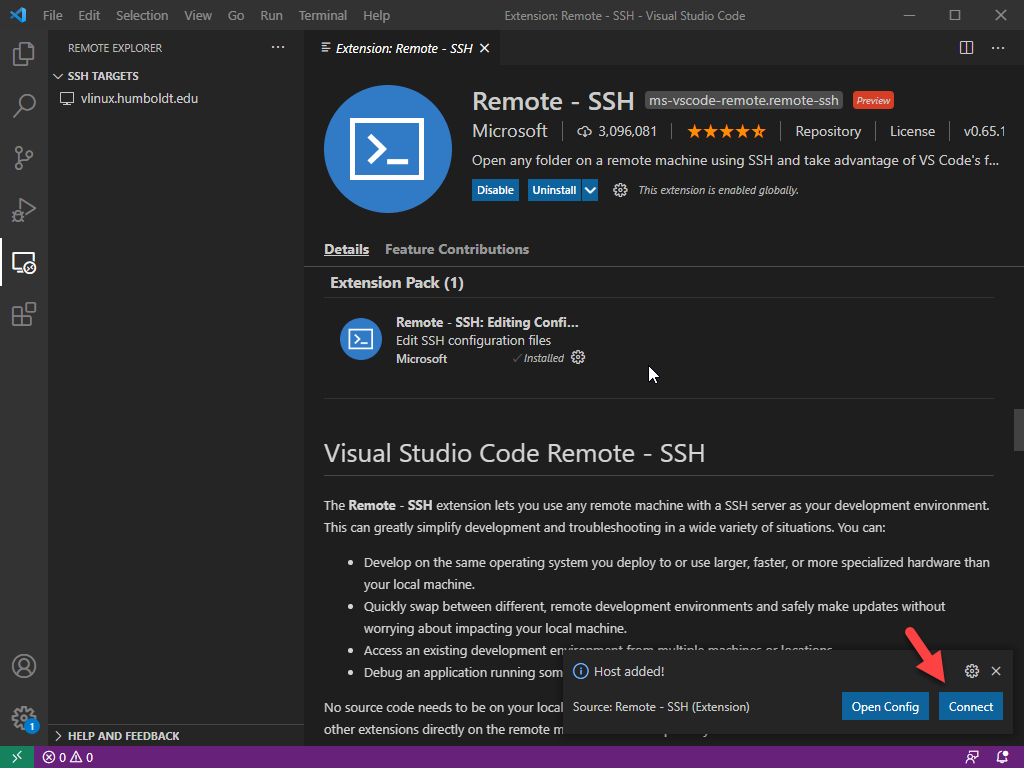
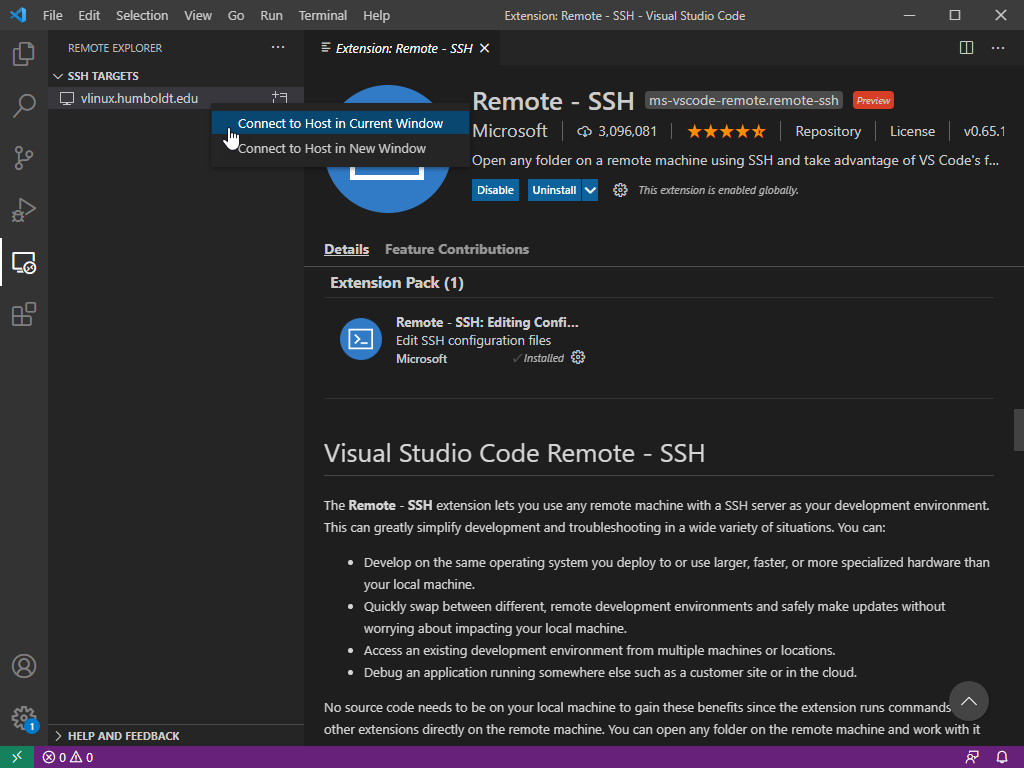
Click connect and then click connect to host in current window:
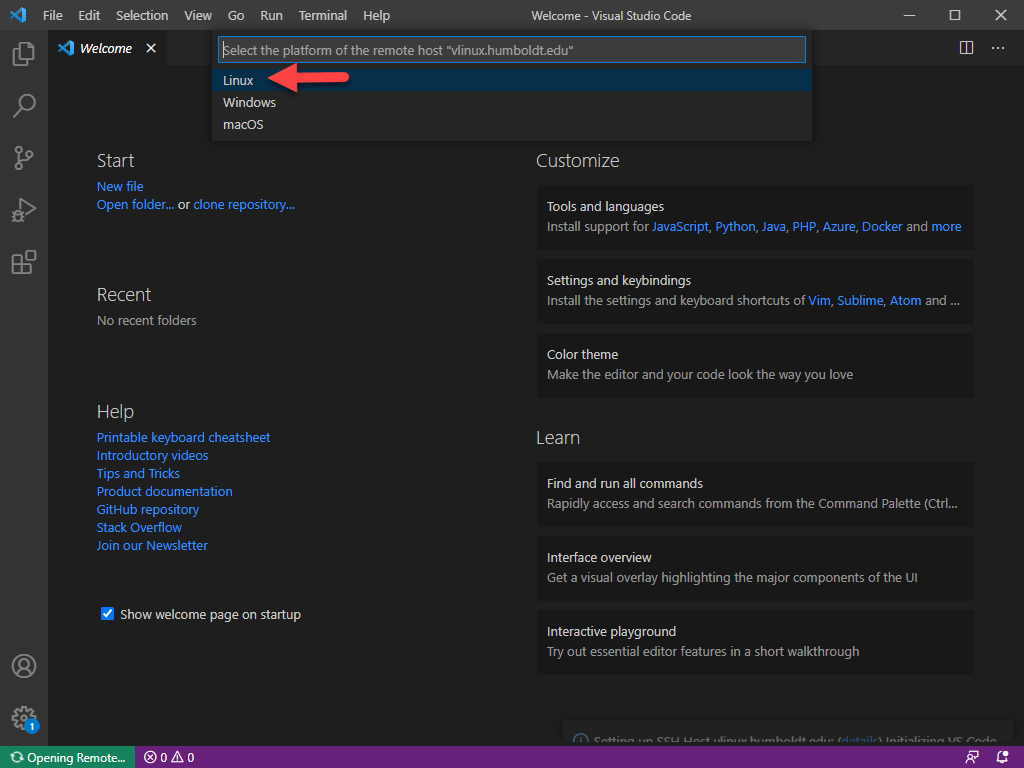
You will be prompted to select the platform of the host to which you are connecting. Click on Linux:
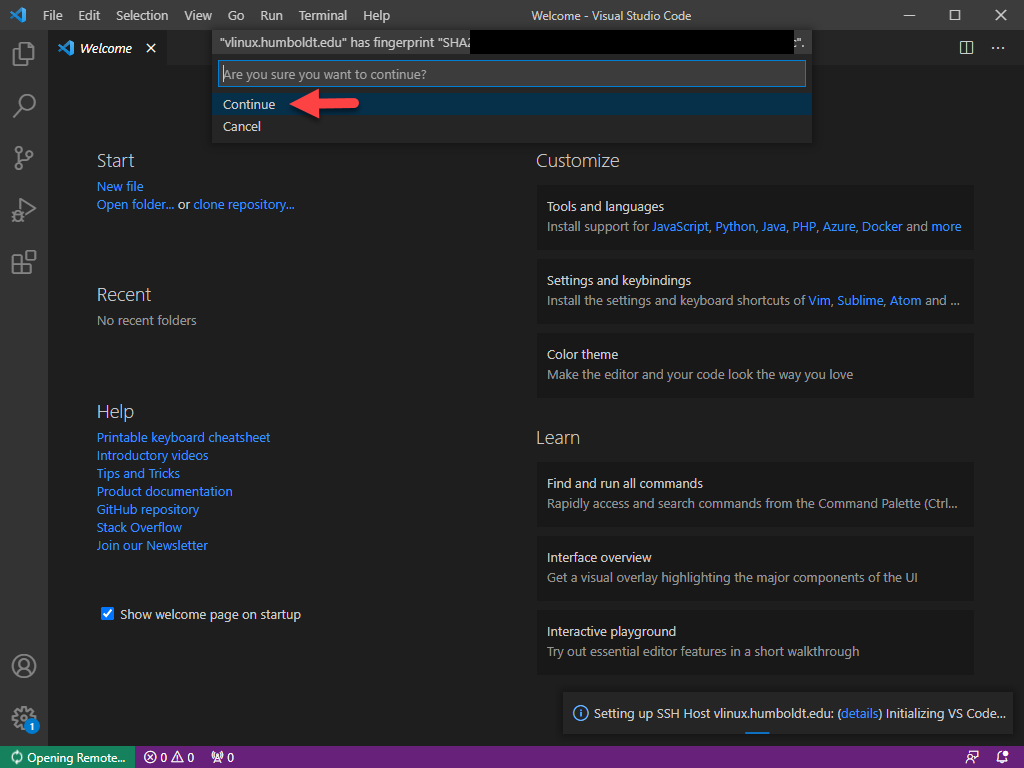
You will be prompted to click continue to accept the RSA host key for the vLinux server. Click on continue:
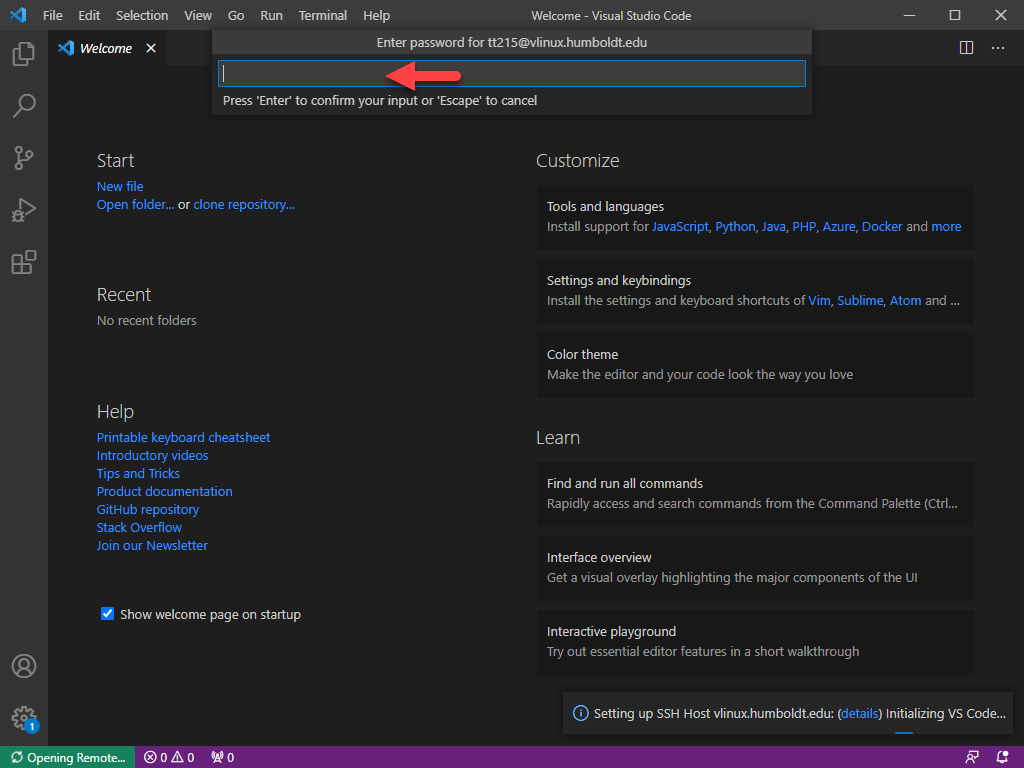
Enter your Humboldt password in the password field:
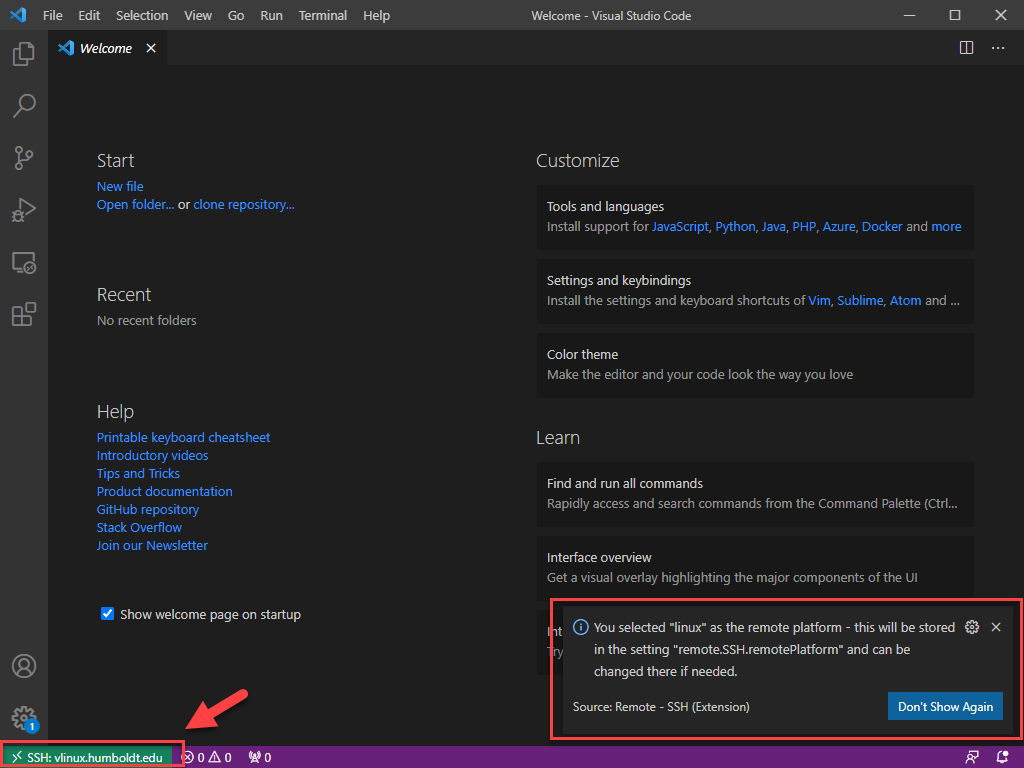
You should now be remotely connected to vLinux from within VS Code (you can tell this by seeing the >< SSH: vlinux.humboldt.edu in the bottom left corner of the VS Code window:
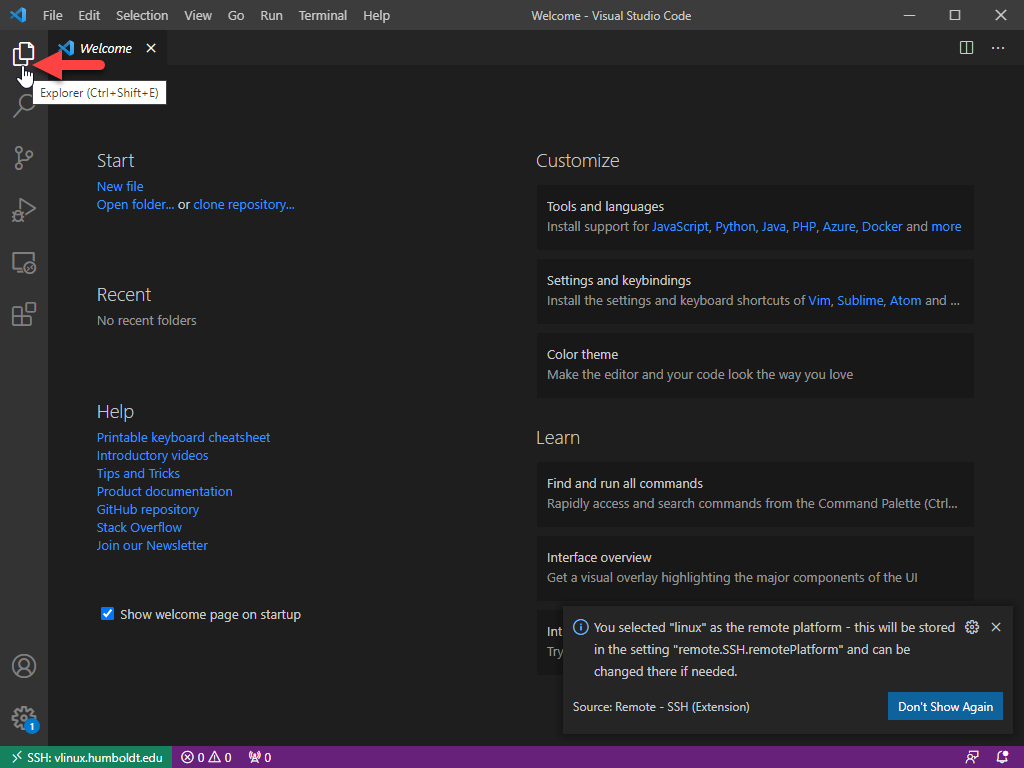
Click on the explorer icon toward the top left of the VS Code window to see the listing of your vLinux home directory's files and folders:
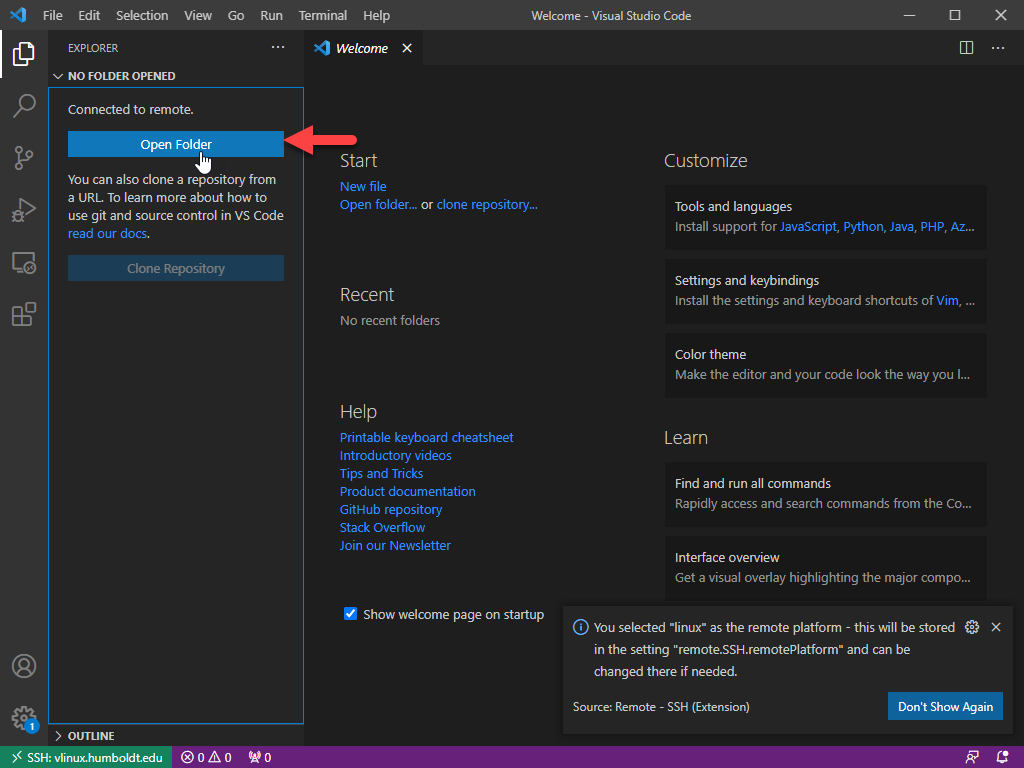
Click on the open folder button:
An open folder command palette will appear showing you the path to your vLinux home directory. Click OK:
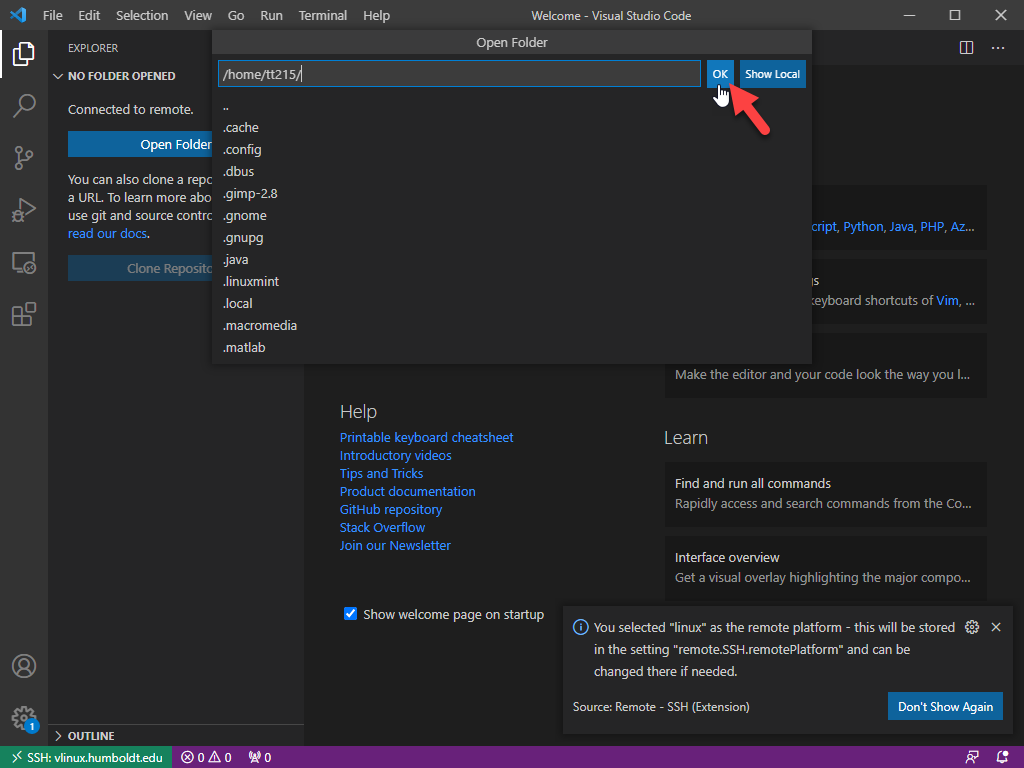
You should now see a listing of your vLinux home directory's files and folders (by default you will see all hidden files and folders so you may need to scroll down to see your recently created files and folders):
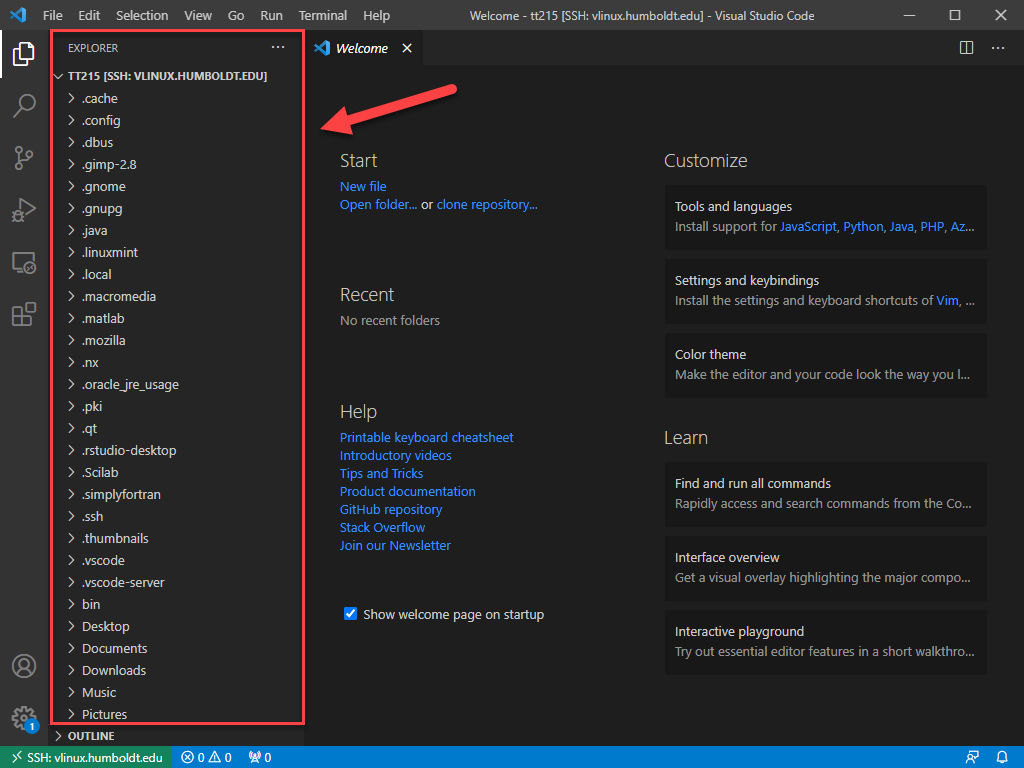
Example showing you how to add a file to an existing directory (e.g. bin directory):
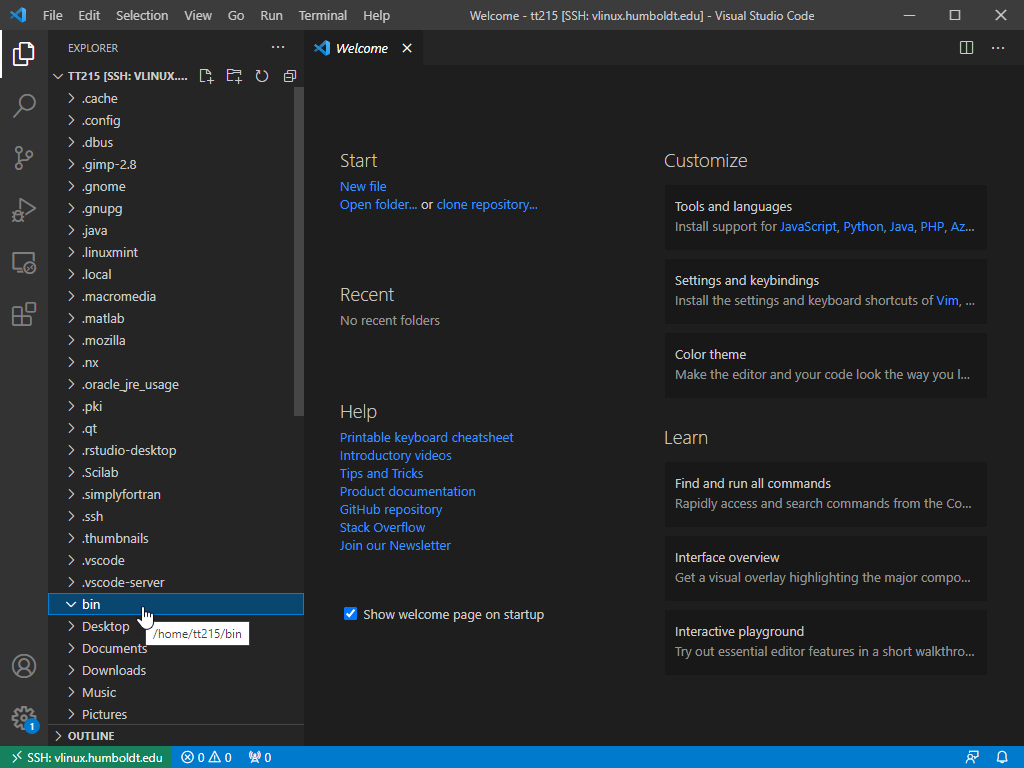
Click on the directory where you want to add a file and then click on the file icon with a plus sign to create the file:
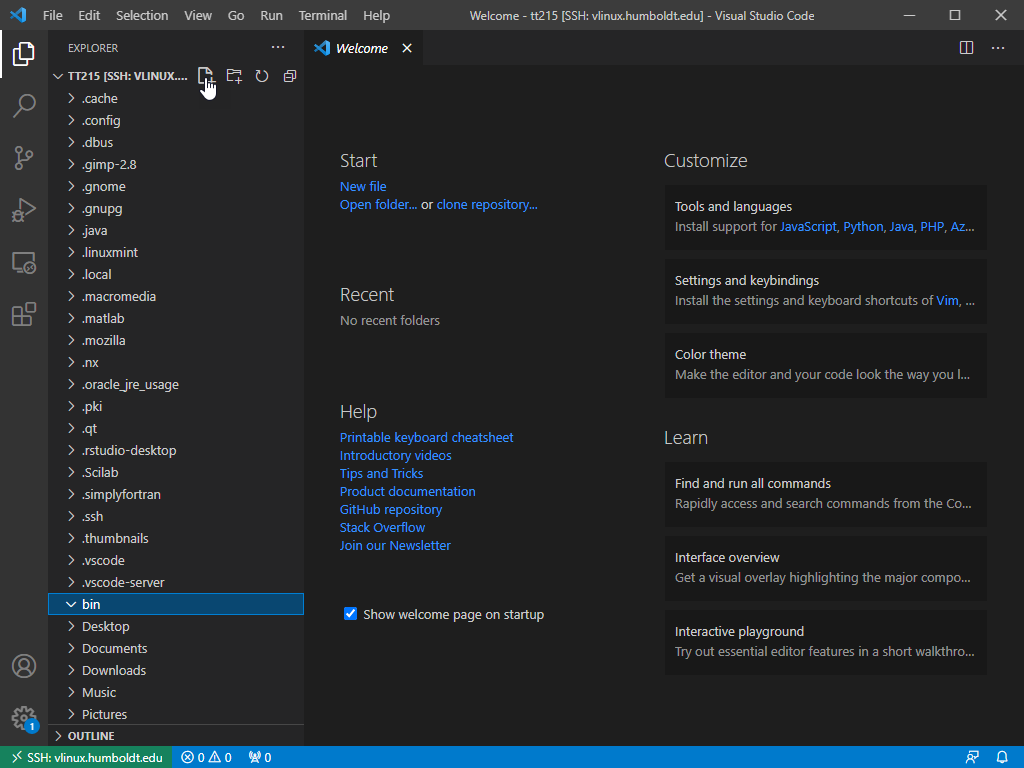
Enter a filename and be sure to include the file's extension in case you want to have VS Code recognize the programming or scripting language you want it to recognize.
If desired, click on install to install the extension for the detected language:
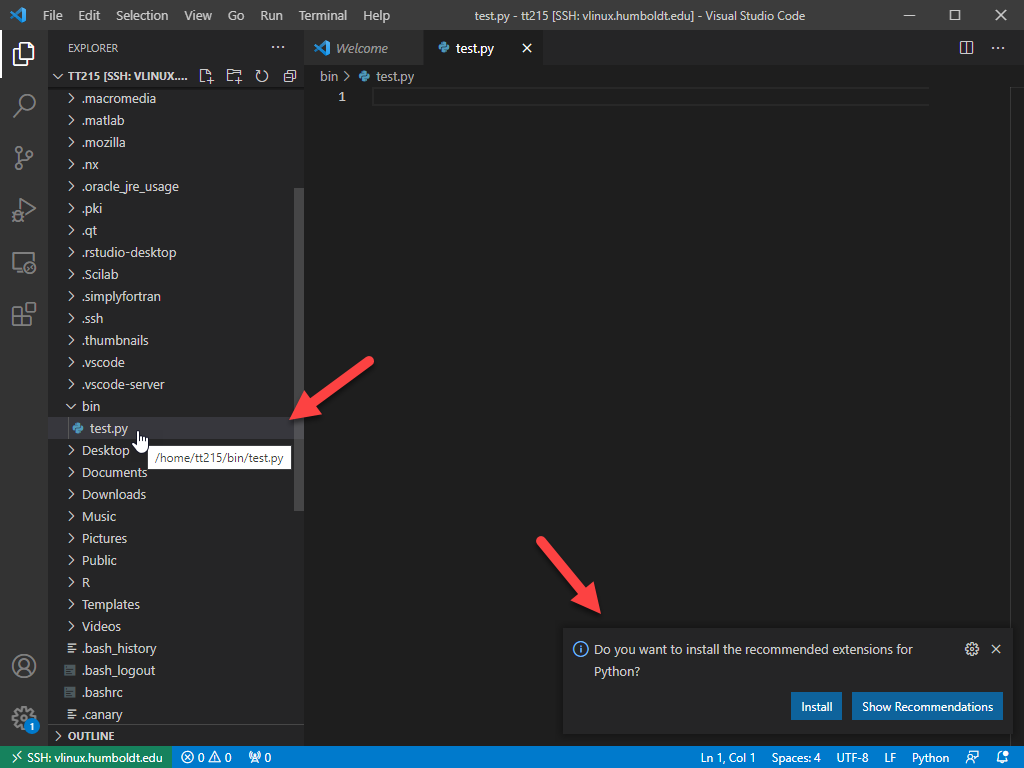
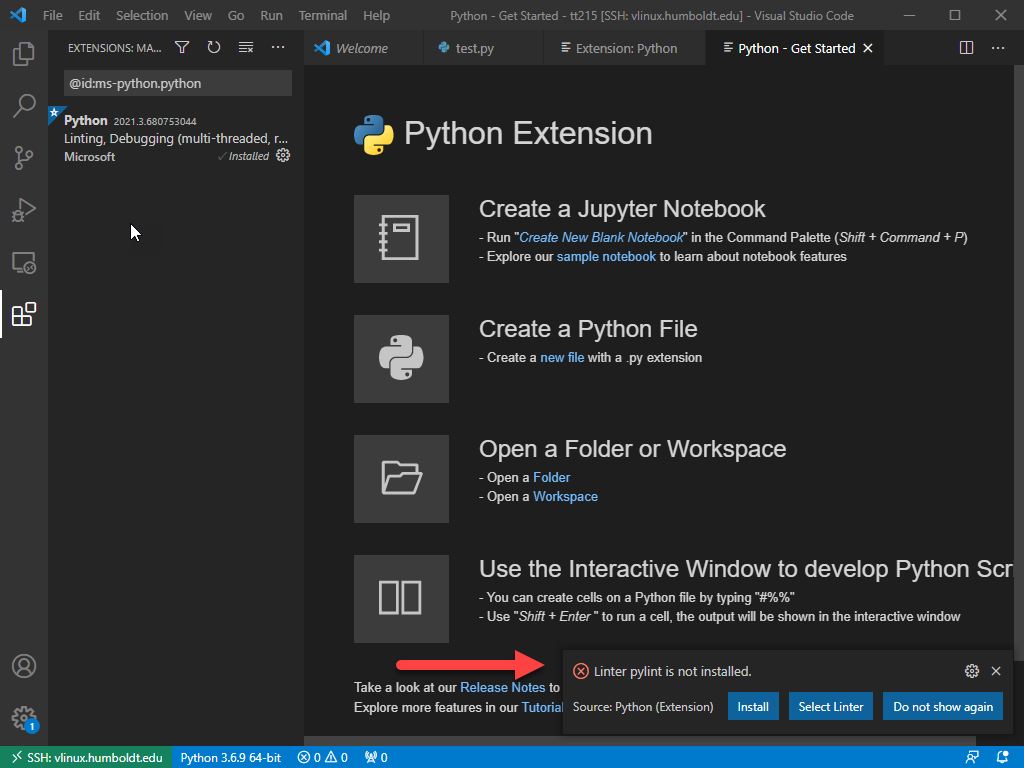
In some cases, you may need to have additional extensions added to fully enable the requested extension:
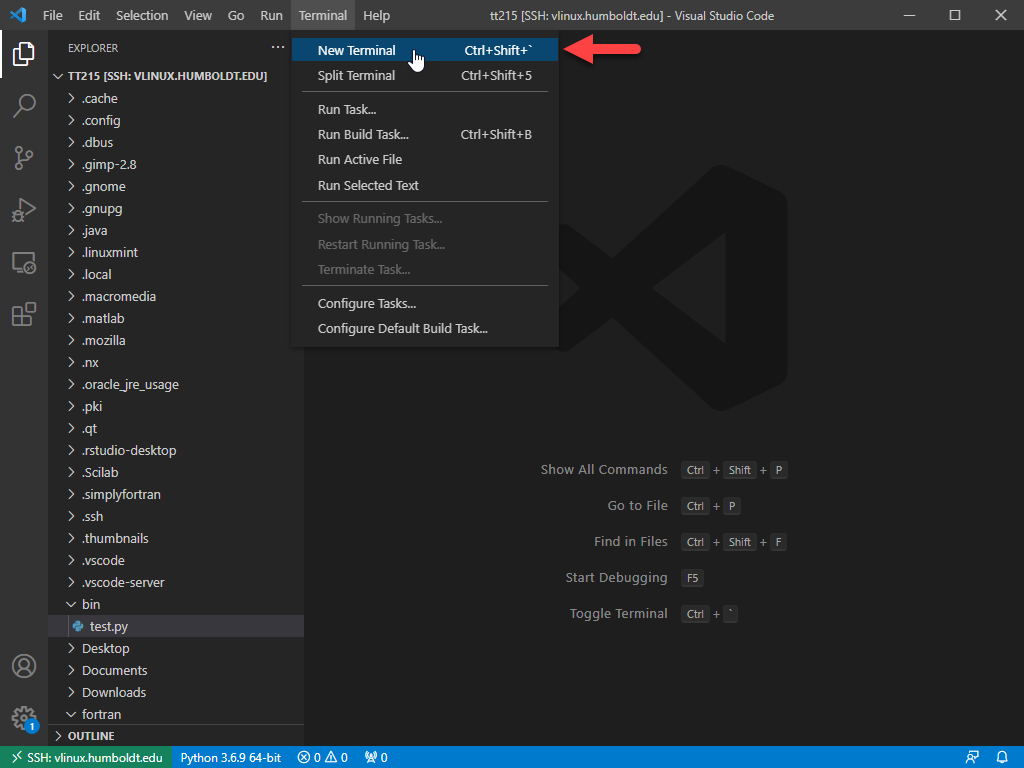
You can also access the bash prompt for vLinux directly from within VS Code. Do to so, click on Terminal at the top of the VS Code window and click on New Terminal:
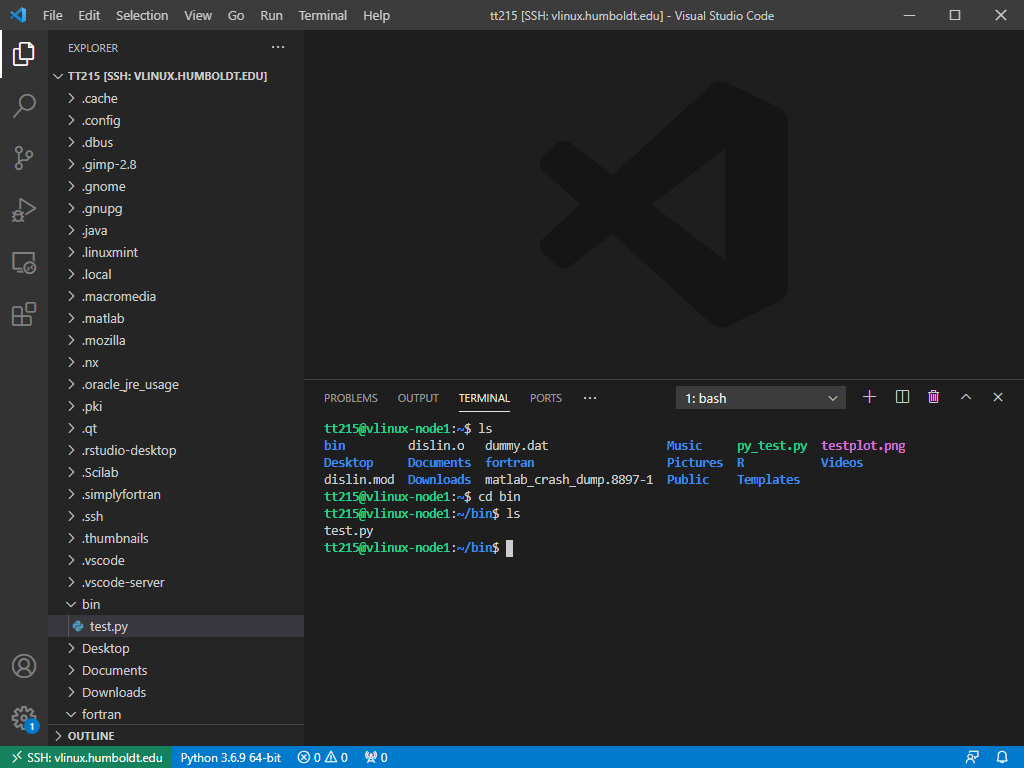
You will now see a terminal window pane appear in the bottom right-hand side of the VS Code window:
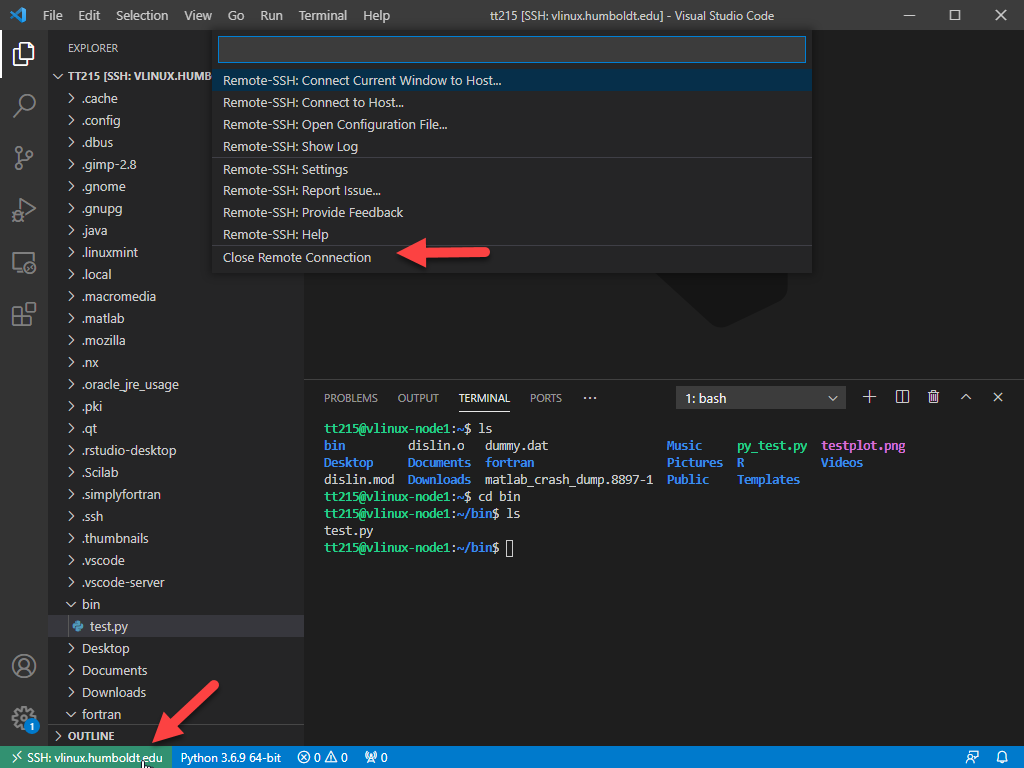
When finished with your session, click on the >< SSH:vlinux.humboldt.edu button at the bottom left of the VS Code window and click on Close Remote Connection:
Help Desk Hours
Fall 2025Monday - Friday 8am - 8pm
Saturday - Sunday 11am - 3pm
After hours emergencies:
Call UPD at 826-5555
System Status
| Status | System | Est. resolution |
|---|---|---|
| Available | All Systems |
|